

Merlind Build Notes:
This site contains affiliate links, including those from Amazon. As an Amazon Associate, we earn from qualifying purchases. This means that if you click on an Amazon link and make a purchase, we may receive a small commission at no extra cost to you.
These commissions help support the content on this site, allowing us to continue providing valuable information and recommendations. We only link to products we genuinely trust and believe will add value to your experience.
Floors, Walls, Ceiling
We start with what we call the shell - floor, walls, and ceiling.
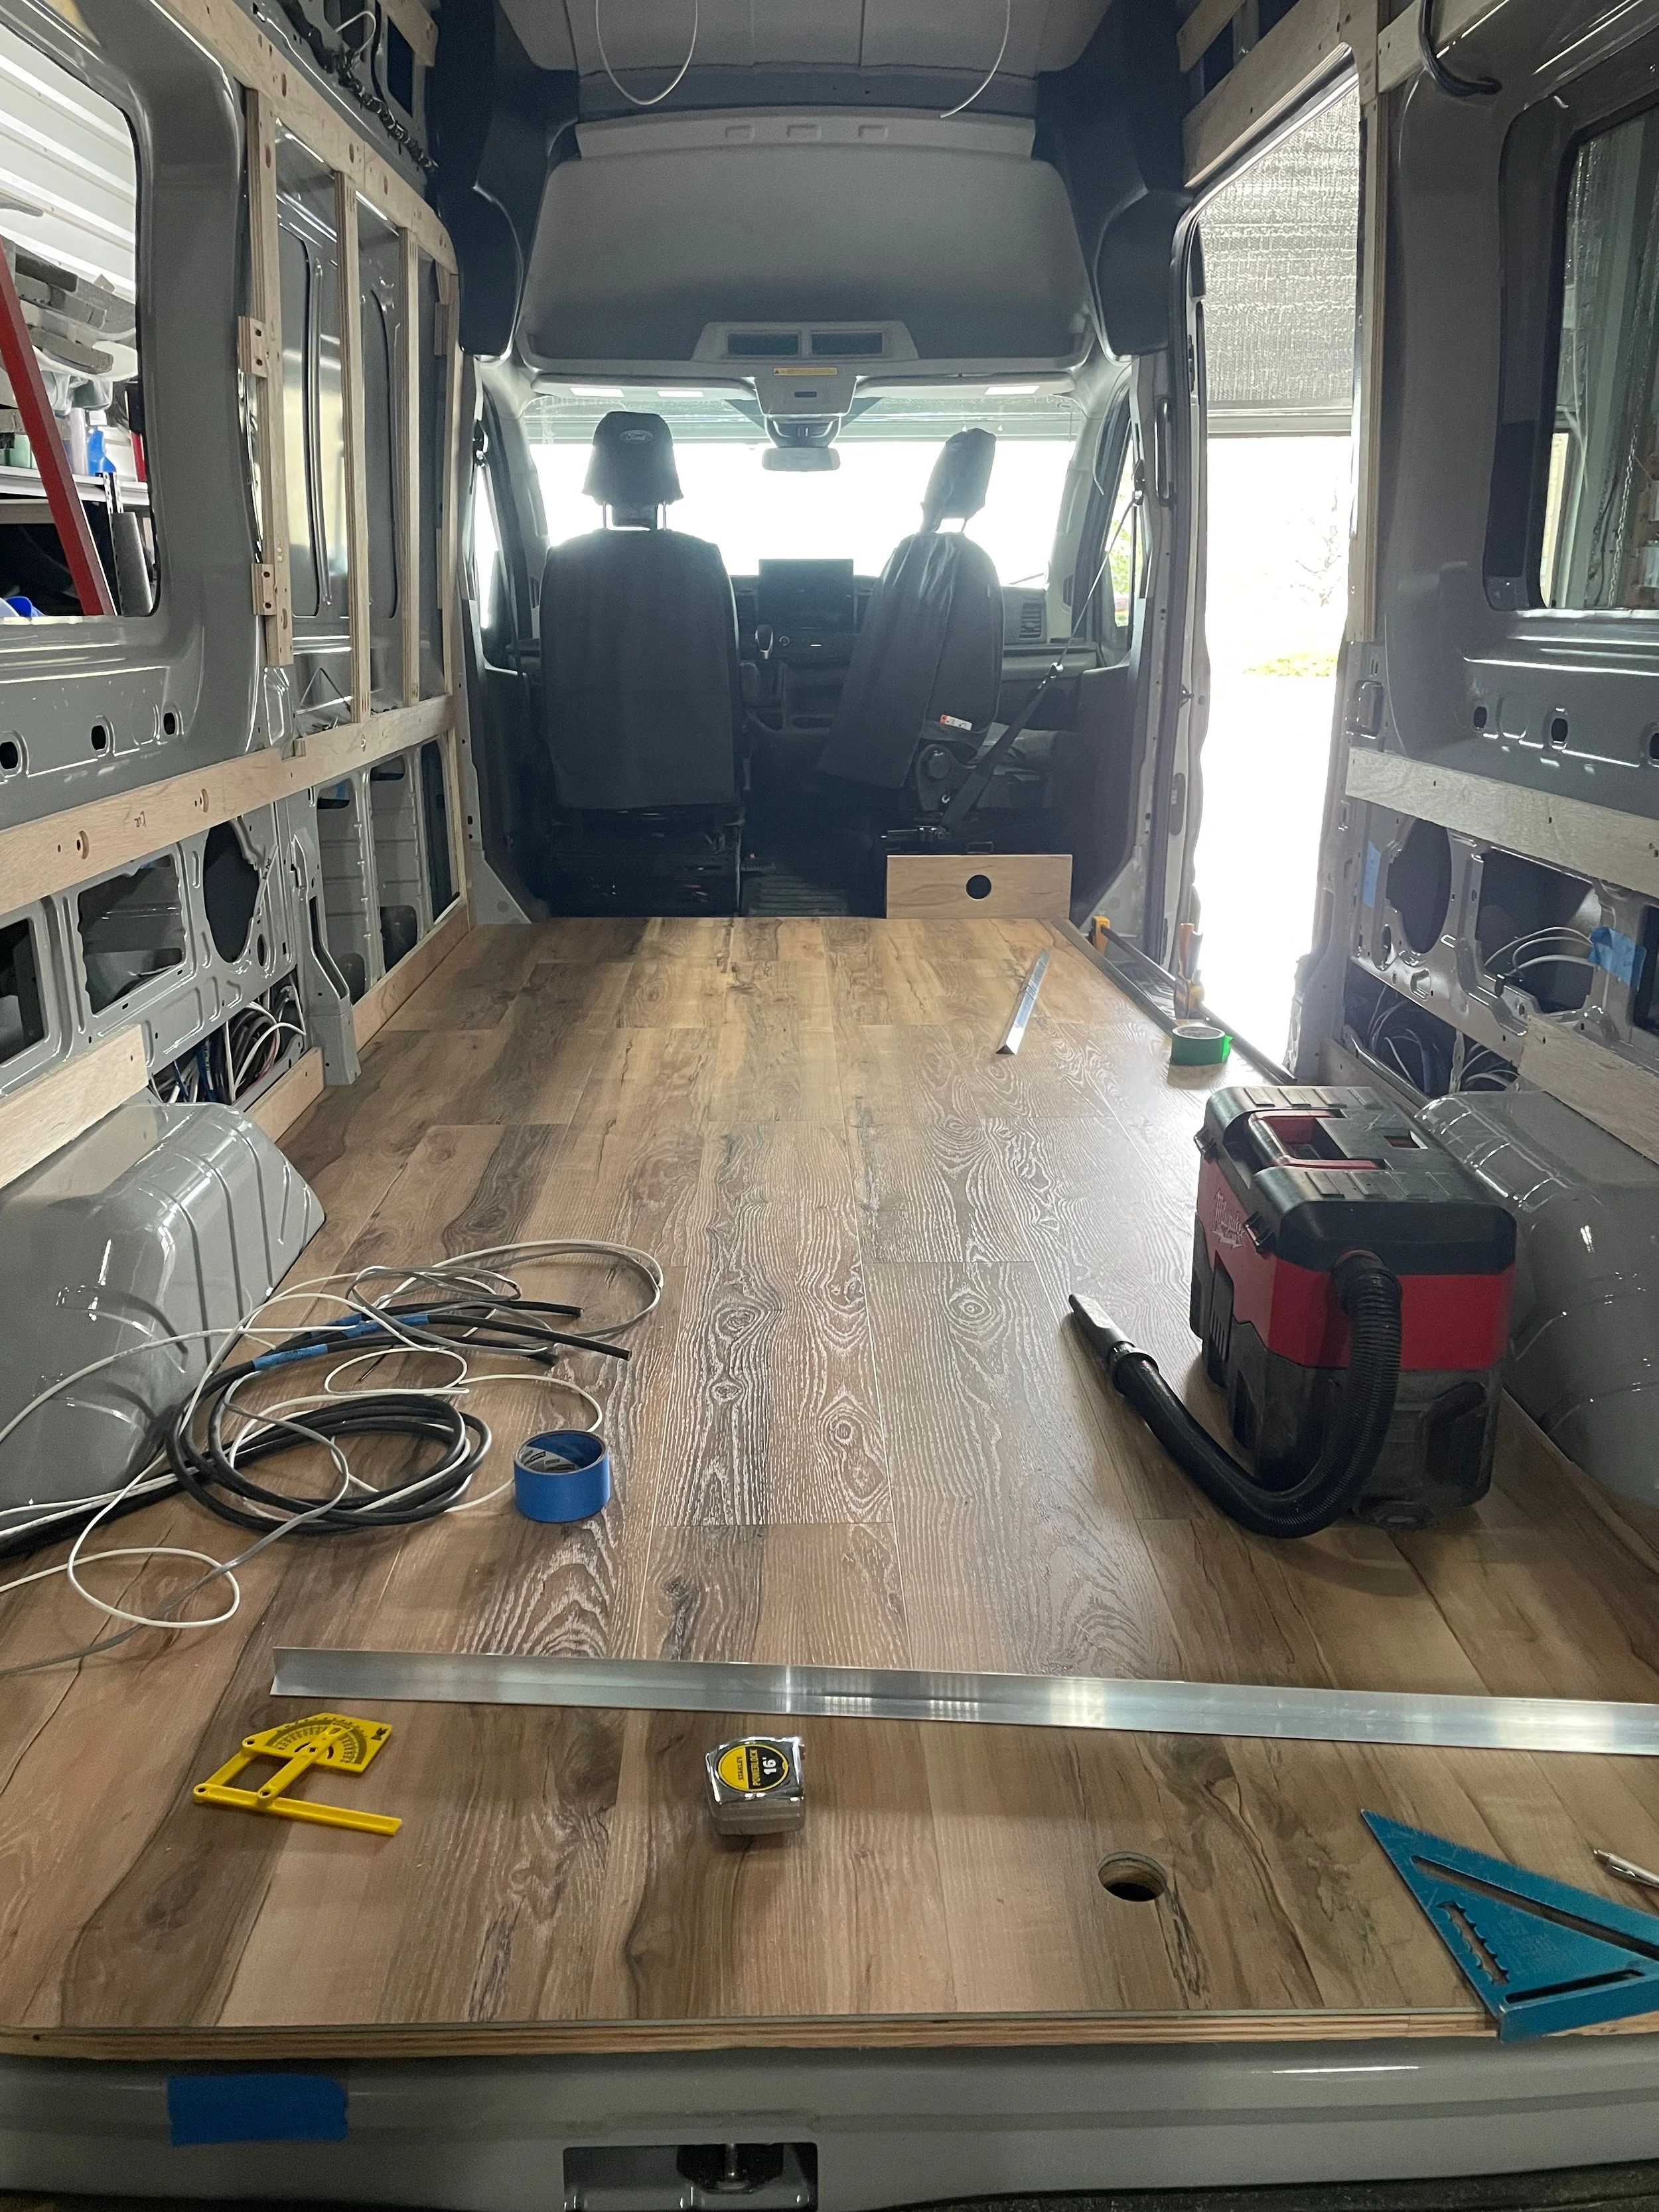
Floor: We start with 3/4” marine grade plywood sourced from National Wood Products for our subfloor.
This van didn’t get an insulated floor - we scuff the high points of the corrugated sheet metal van floor and used Sikaflex-252 to stick the treated plywood to the van floor.
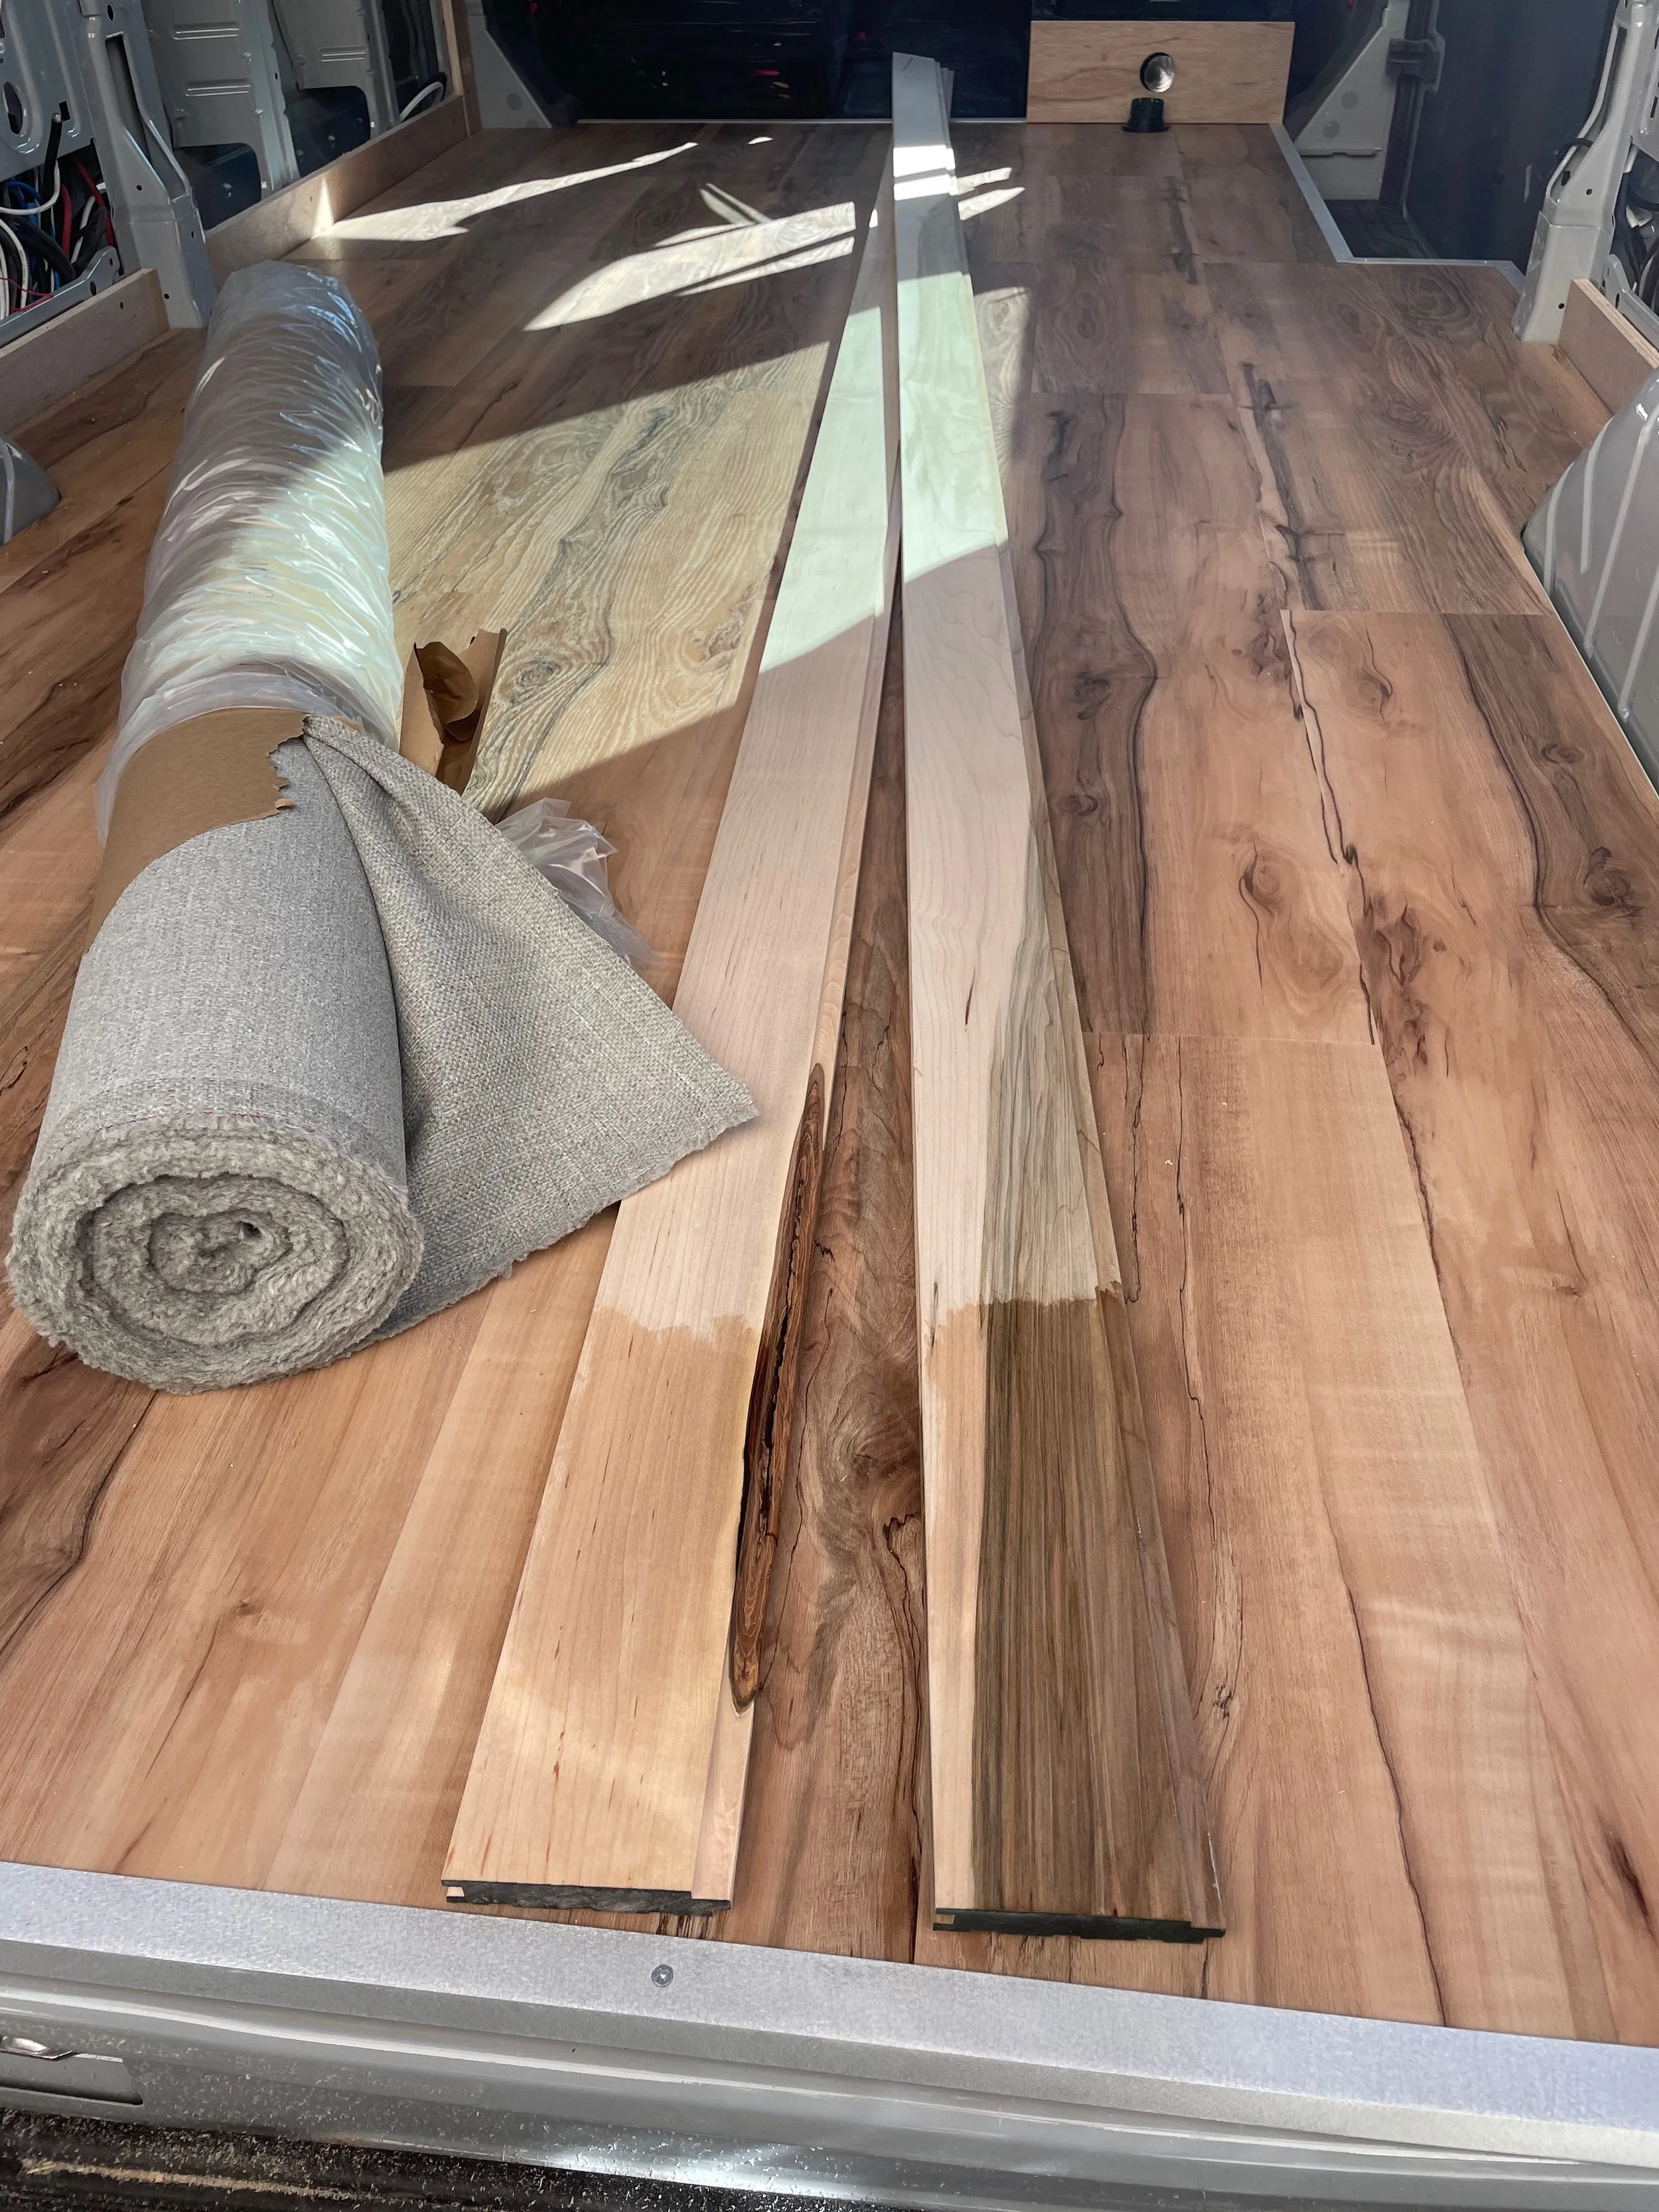
Like most of the vans we work on, these clients opted for a luxury vinyl plank flooring. We like the comfort, durability, and easy cleaning of waterproof LVP options. The style this client chose was Lifeproof Pagent Hill Maple.
The final step for our standard flooring is trim. We use a 1” x 1'/8” wall aluminum angle that we source from Alreco Aluminum in Henderson, CO to cover up the plywood and floor edges where they are exposed. We typically leave the aluminum raw which sands to a nice consistent finish and can be sanded again if it ever gets damaged.
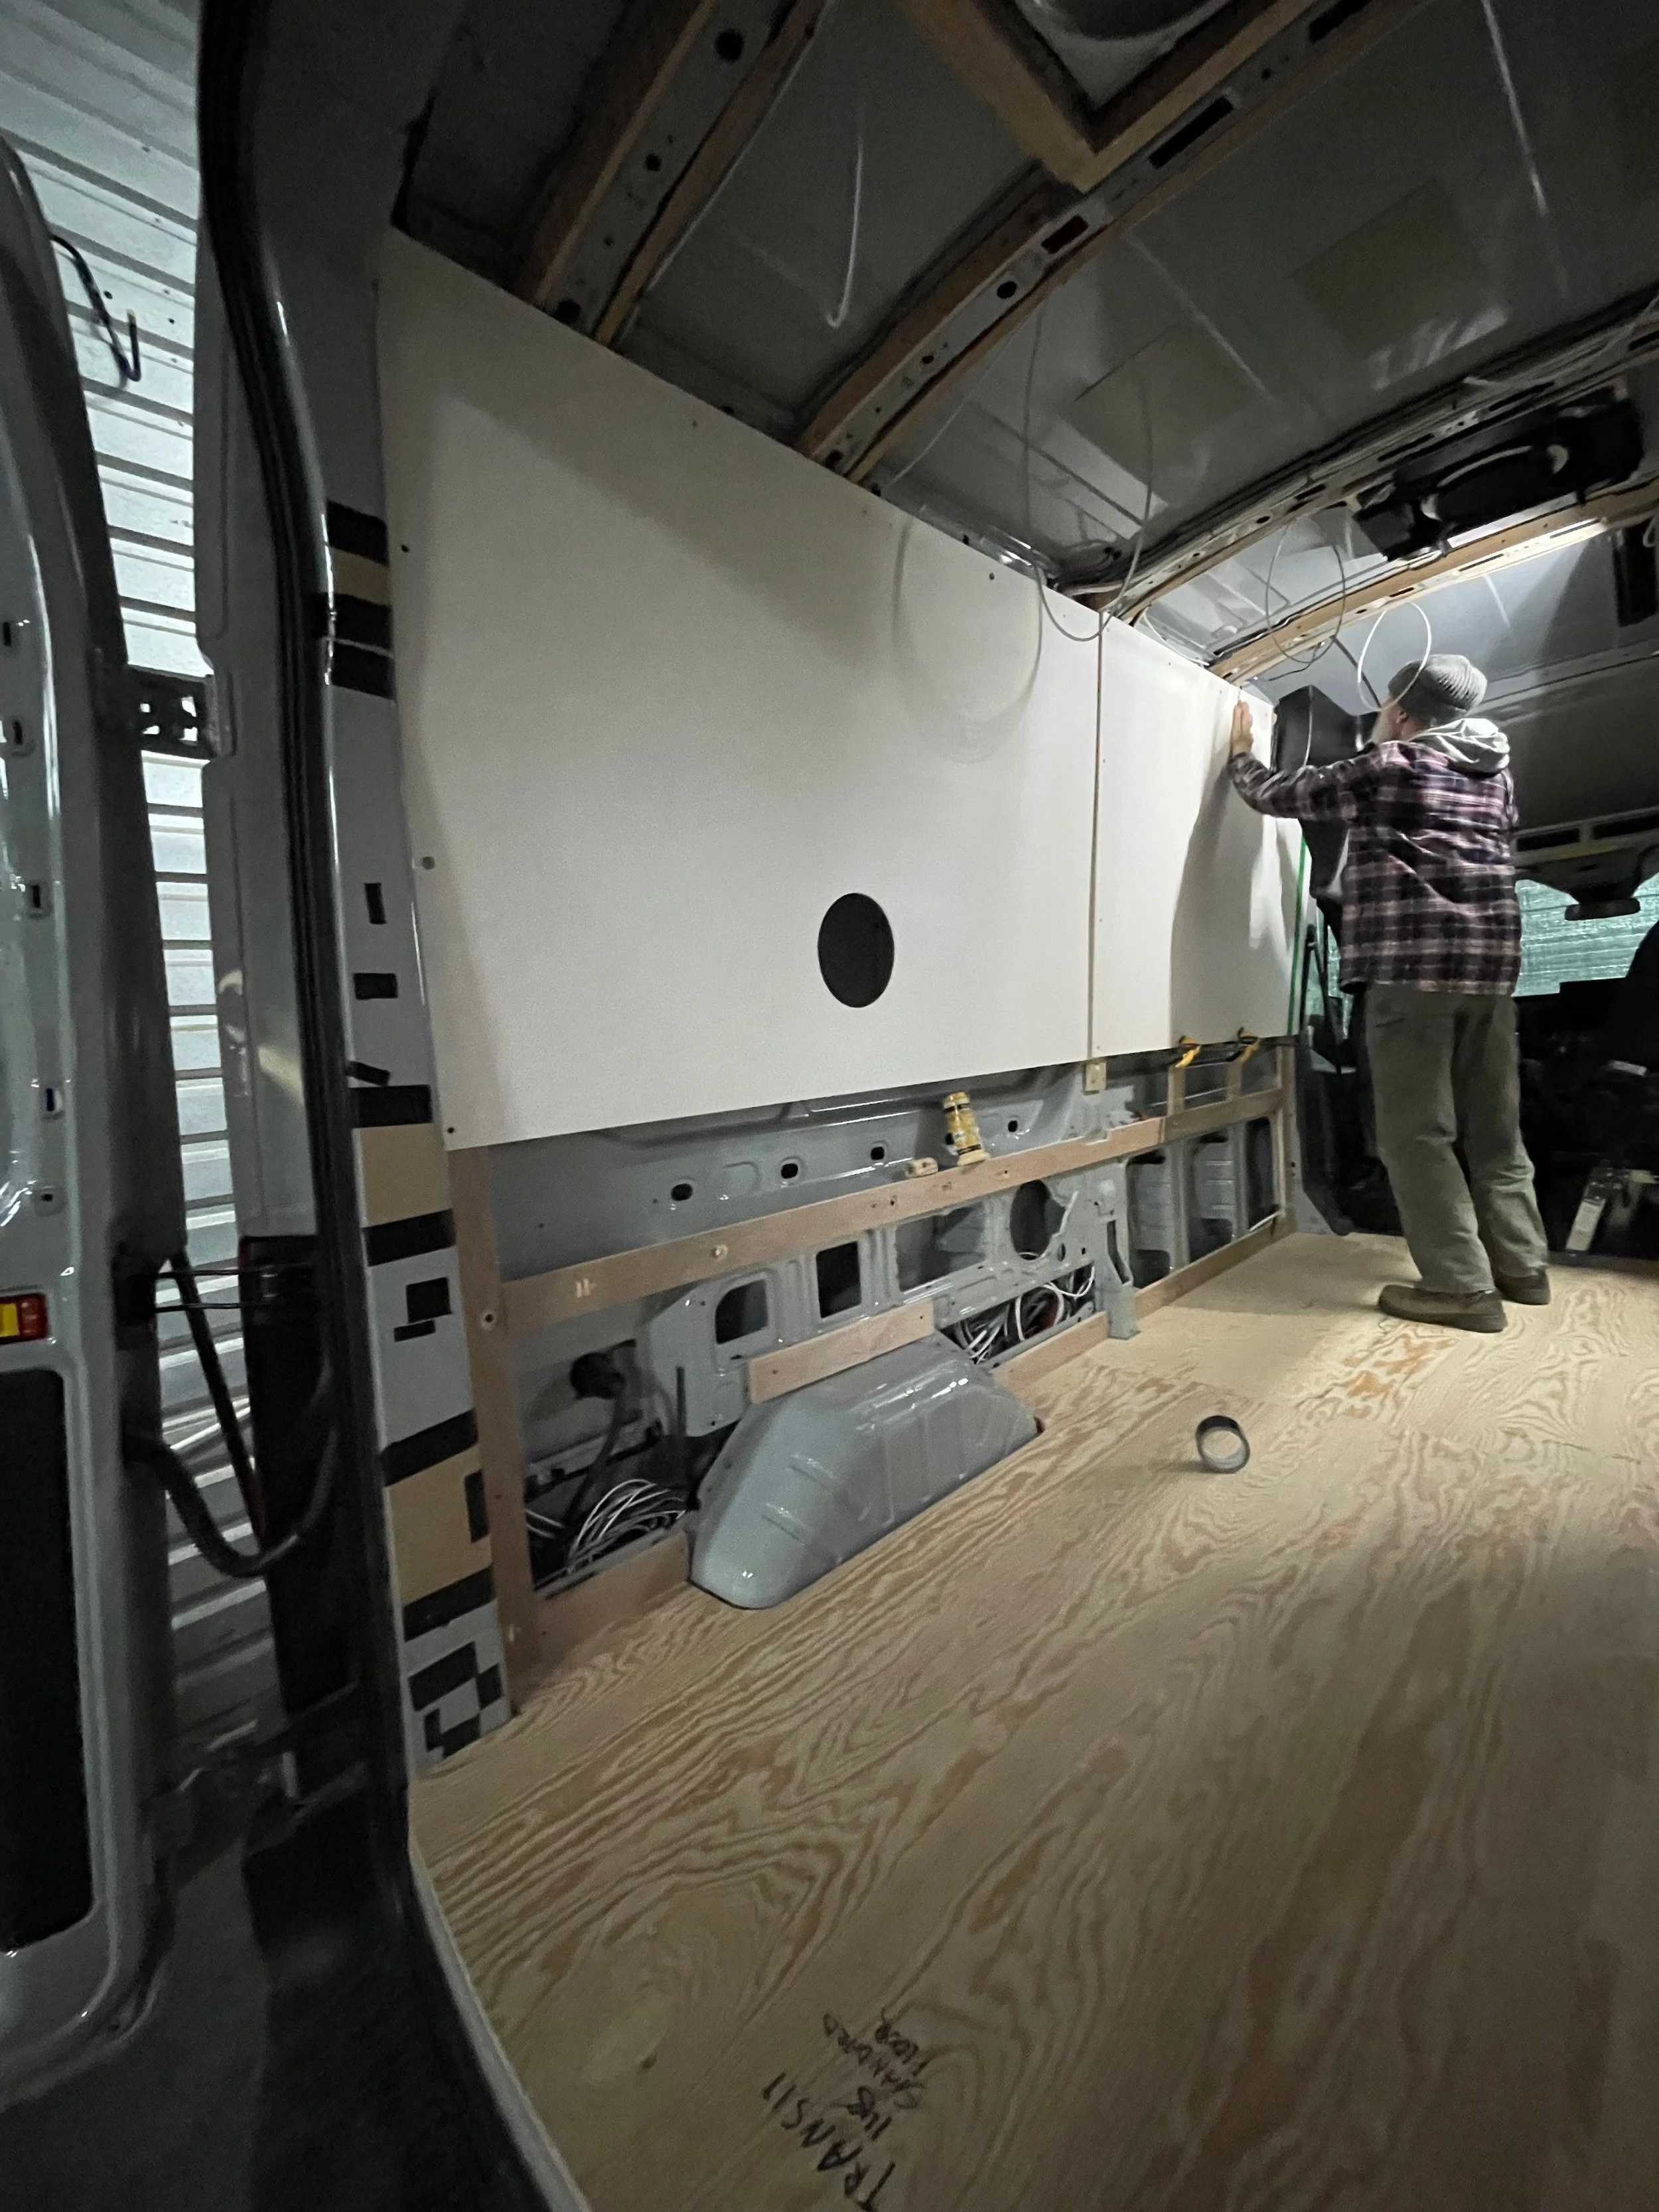
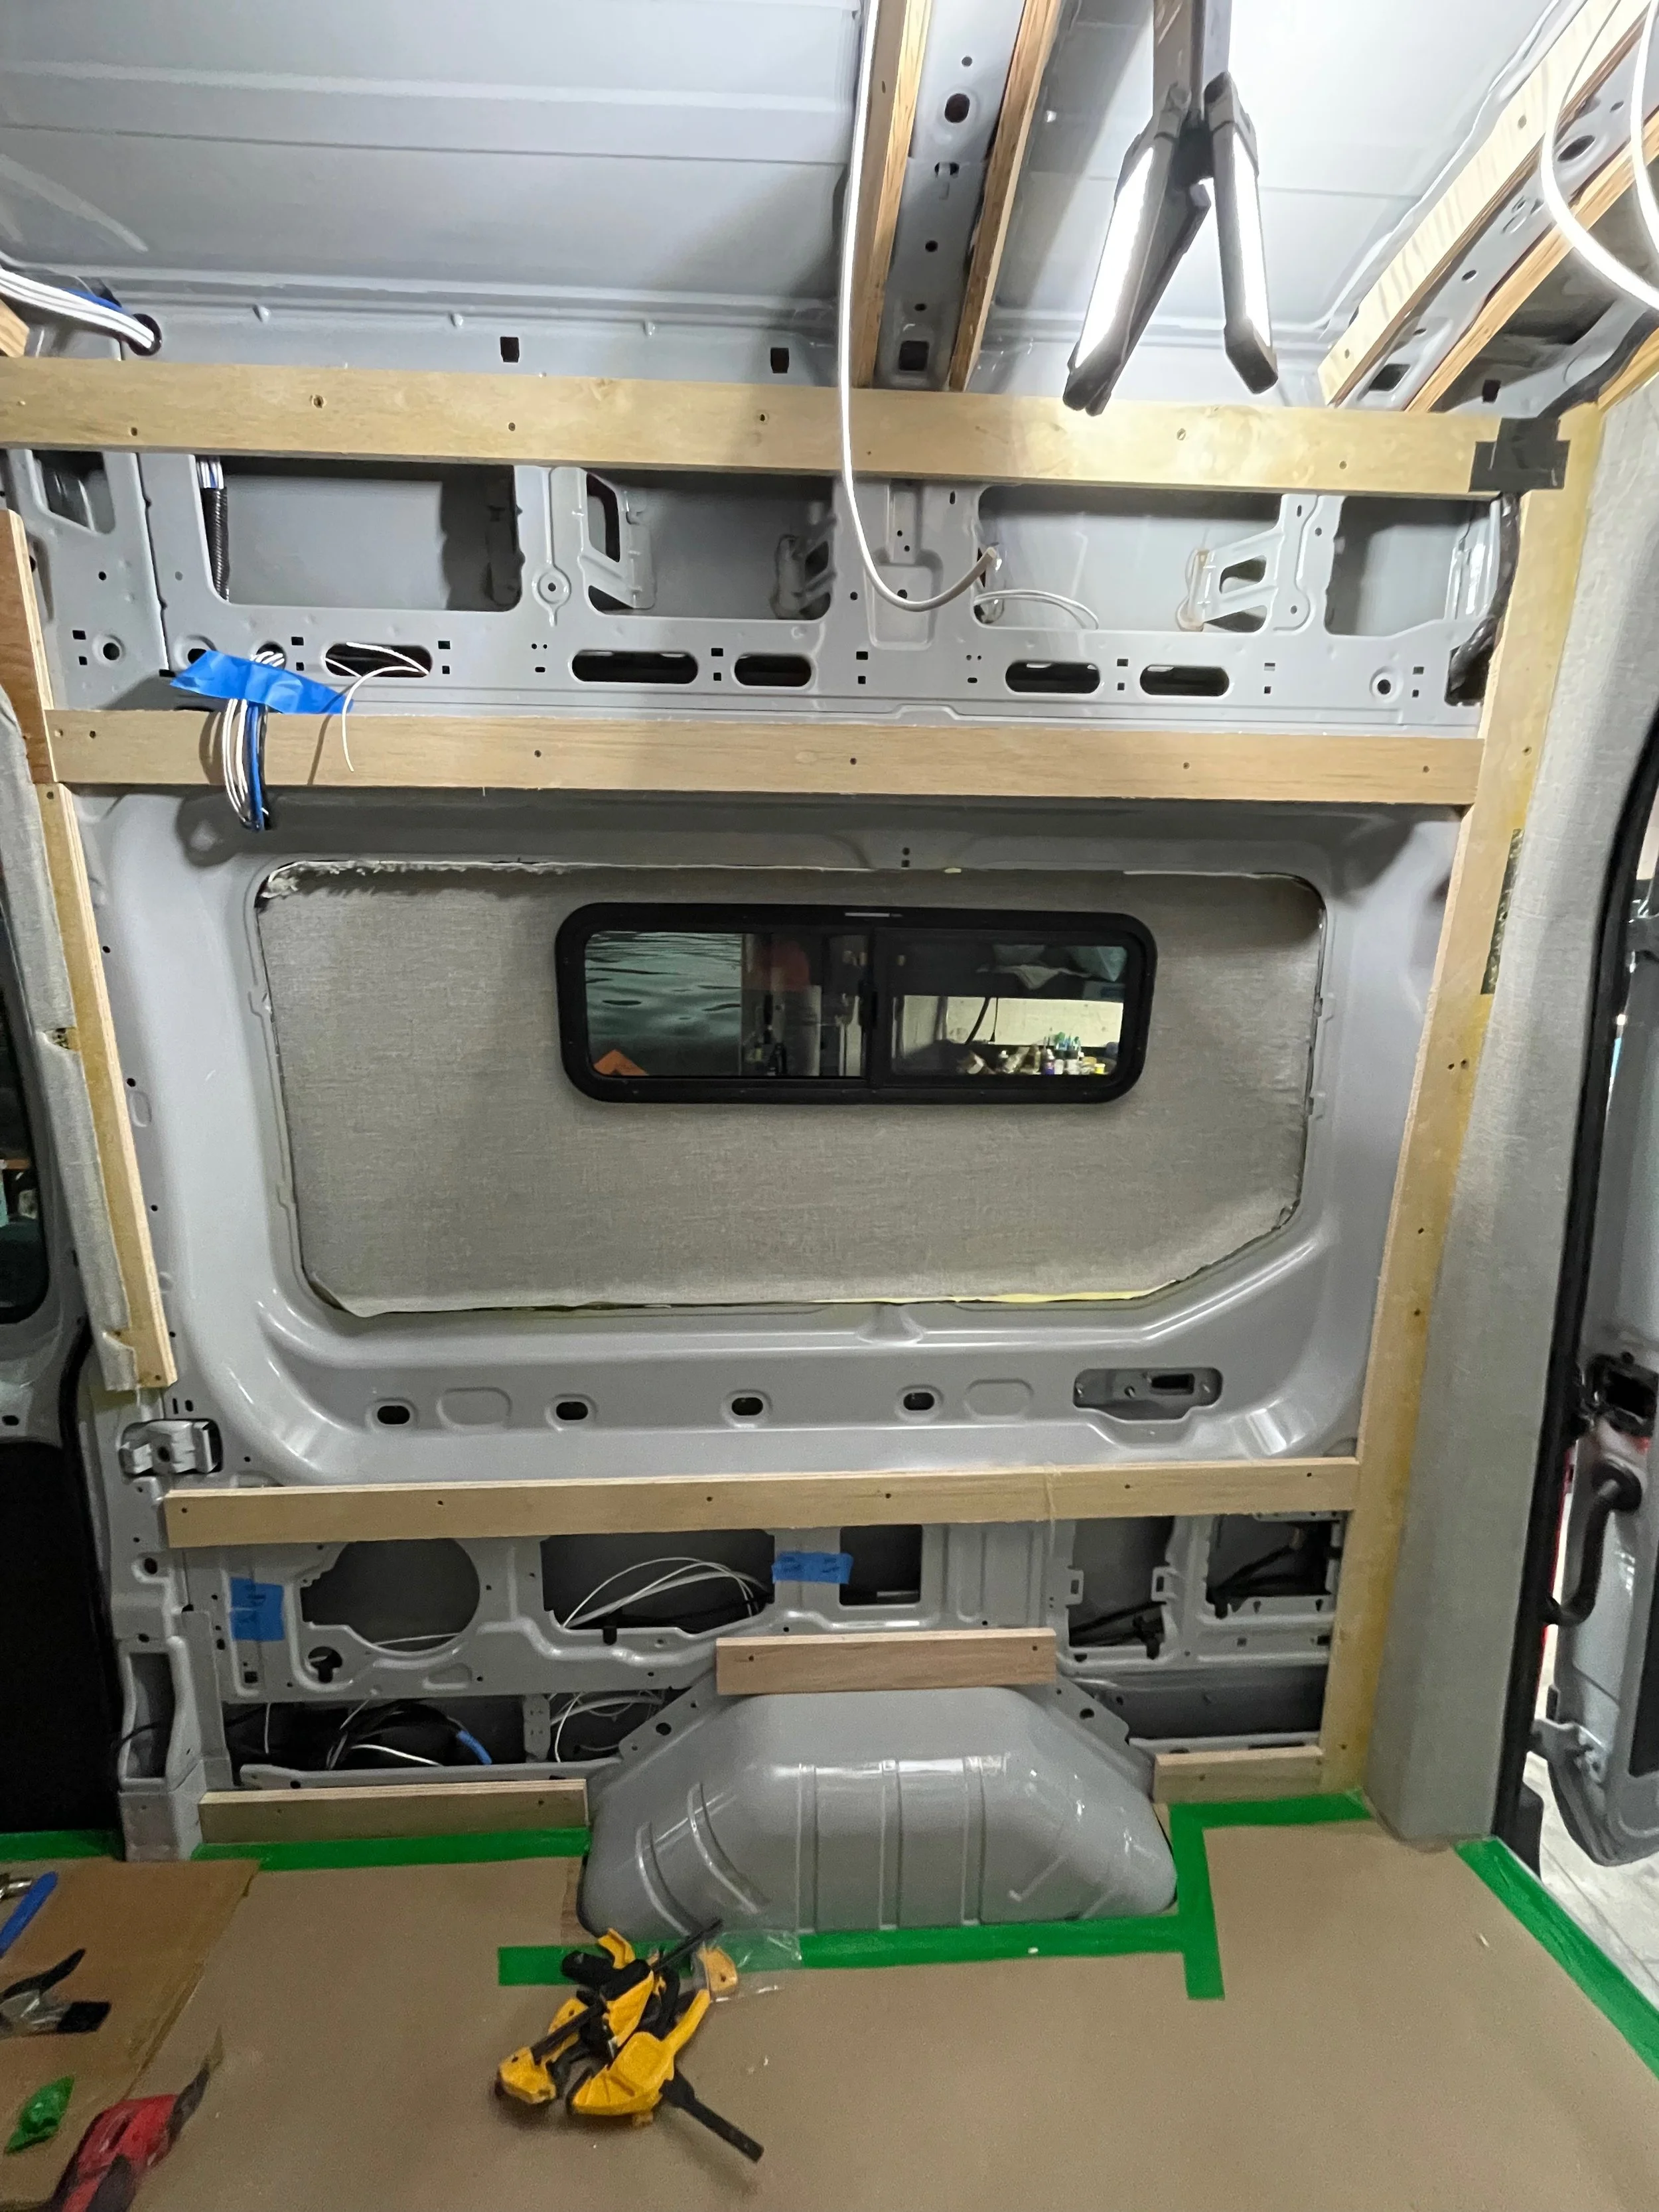
Walls: First step on the walls is to pack everything with insulation.
This van got Havelock Wool insulation installed everywhere we could fit it.
We install our wall panels with 35mm panel bolts and 1/4-20 wood inserts set into 3/4 plywood framing that we install on the walls. We have found after a handful of Transit builds that using our own framing saves time, drill bits, and ligaments (Transit sheet metal can be crazy hard to drill through for riv nuts - some spots in these vans are “Supersteel” as we call it).
Our wall panels on this van were made of 1/4” PVC foam board and we always upholster our wall panels with 1/8” closed cell foam and our finish fabric - in this van it was Marathon Tweed Grey Mix. The closed cell foam makes the panels feel warmer and more comfortable to the touch.
We always wrap the metal thresholds in our vans so we used the same fabric for the slider and rear door openings as well as the GoCode Transit front trim kit that we use in the front of every Transit build. These give us a nice hard line to run our ceiling into and save a ton of time finishing the transition from ceiling to
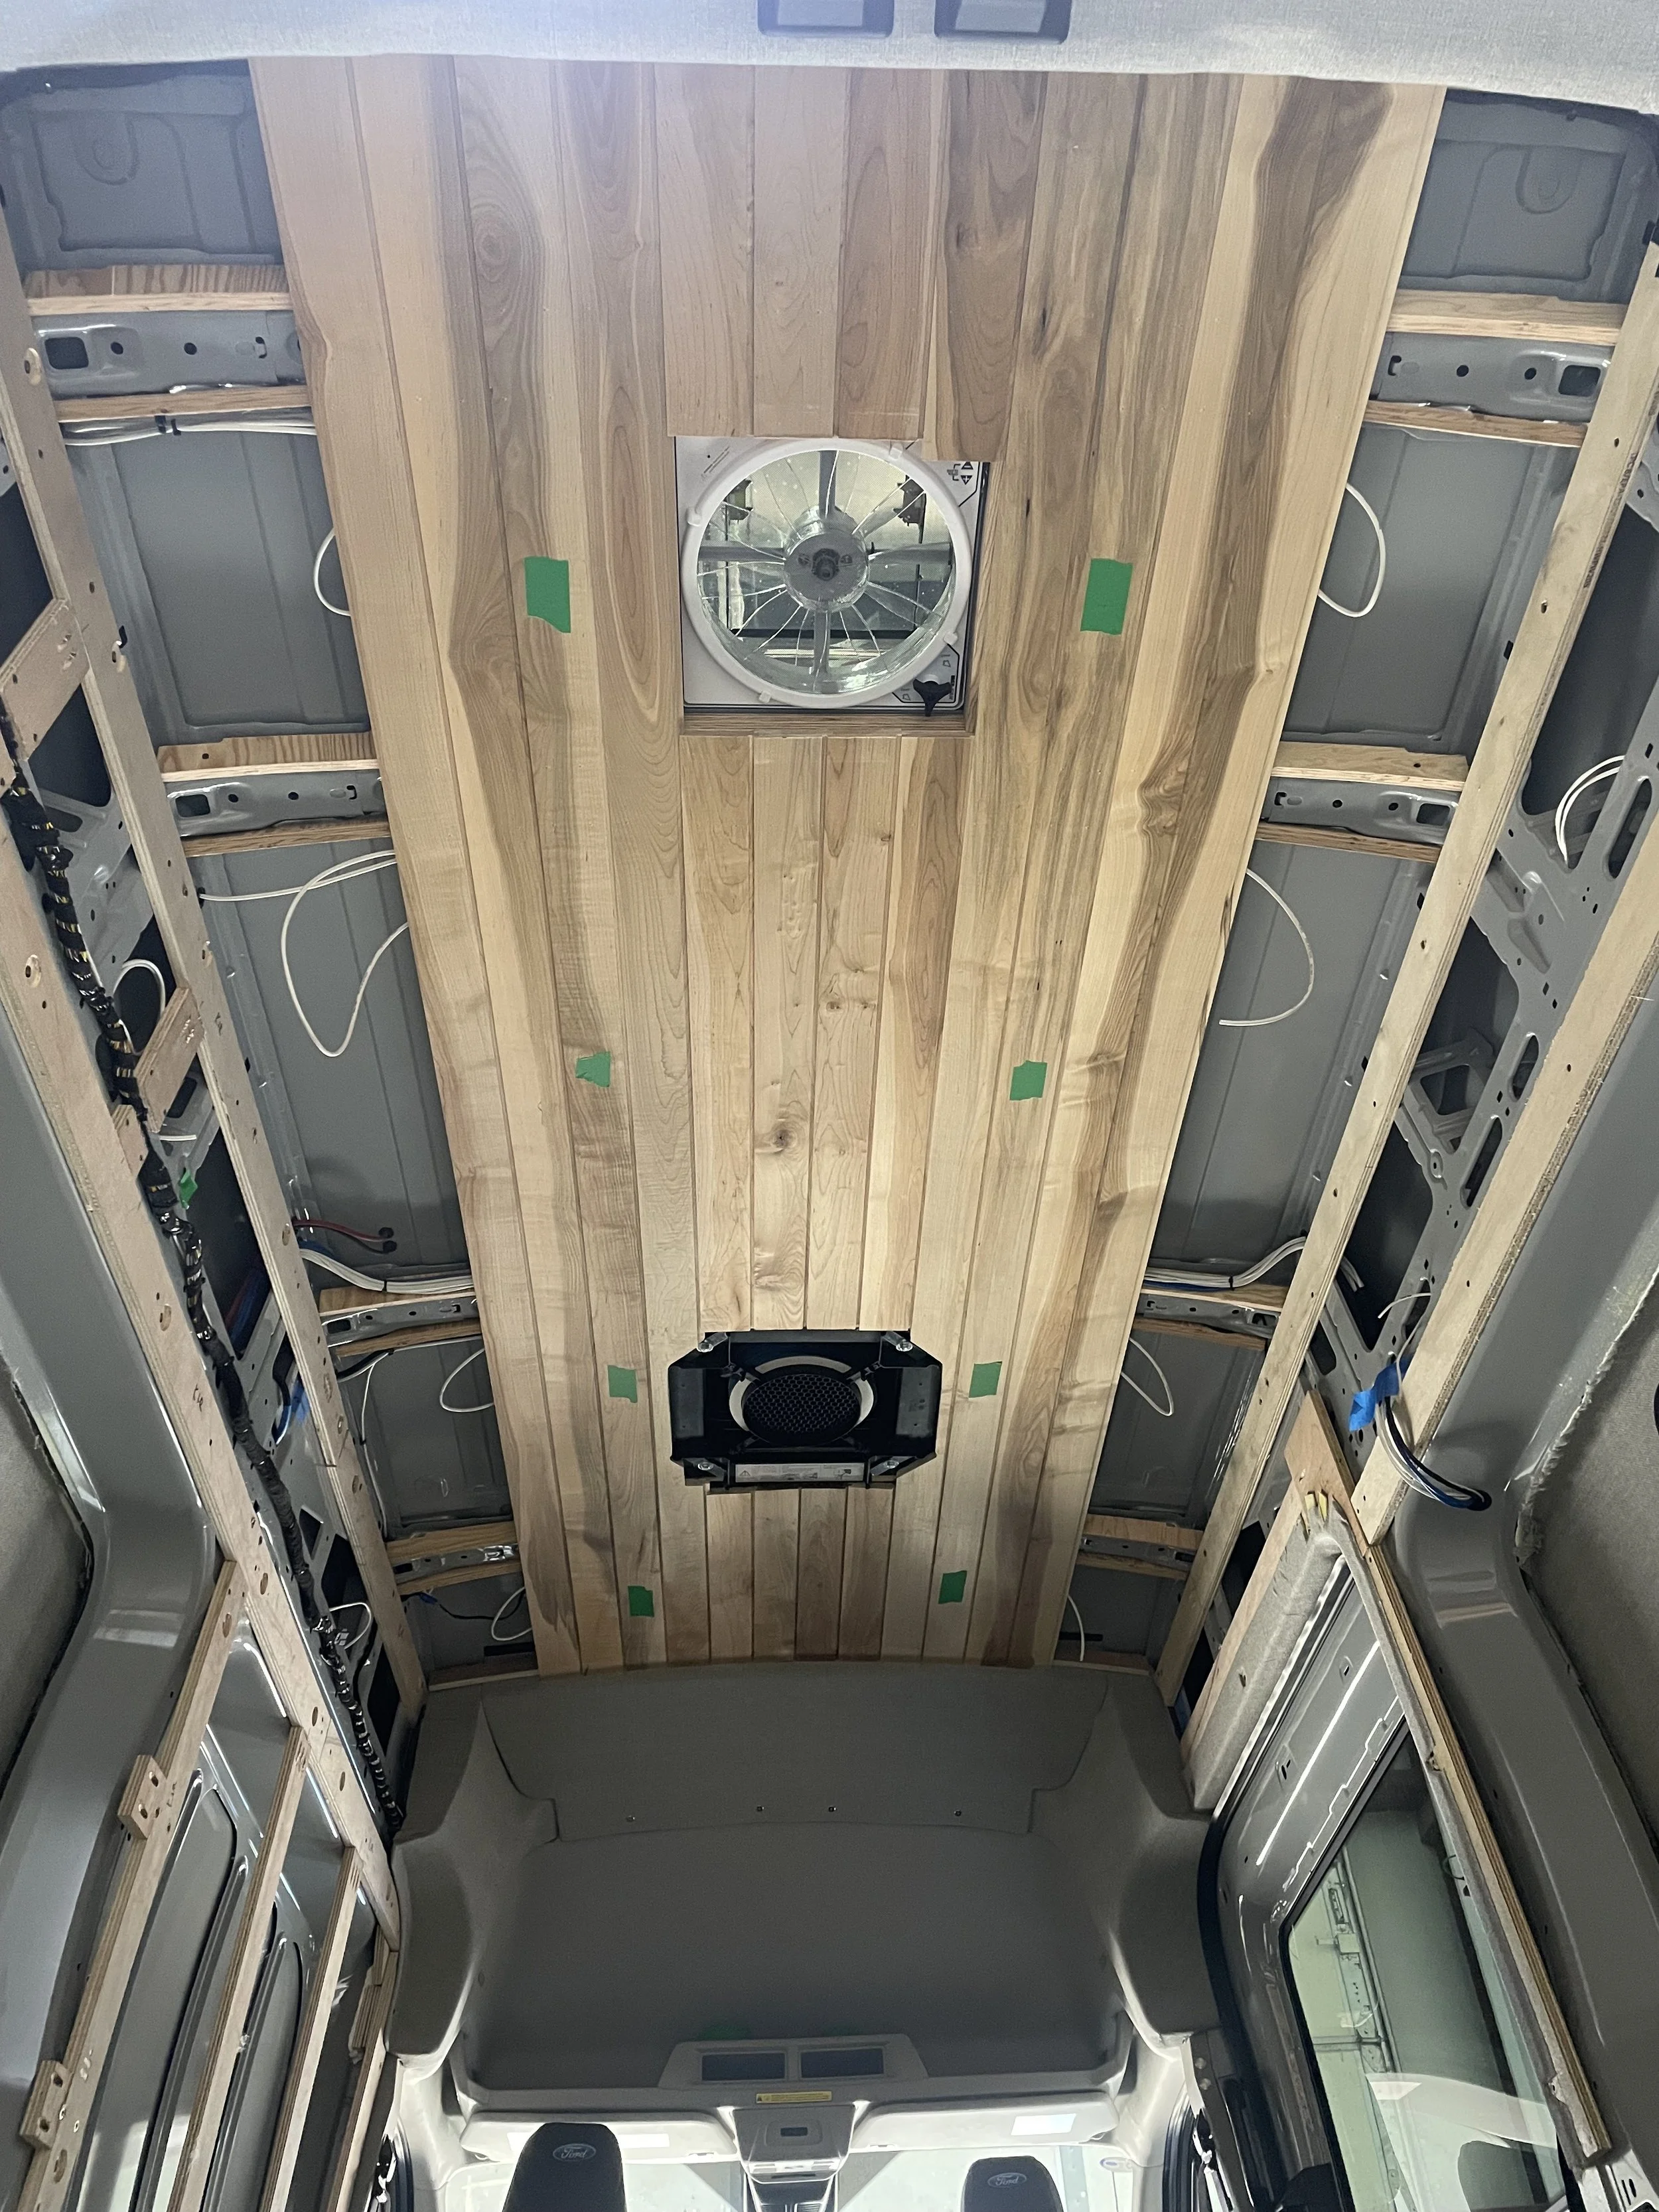
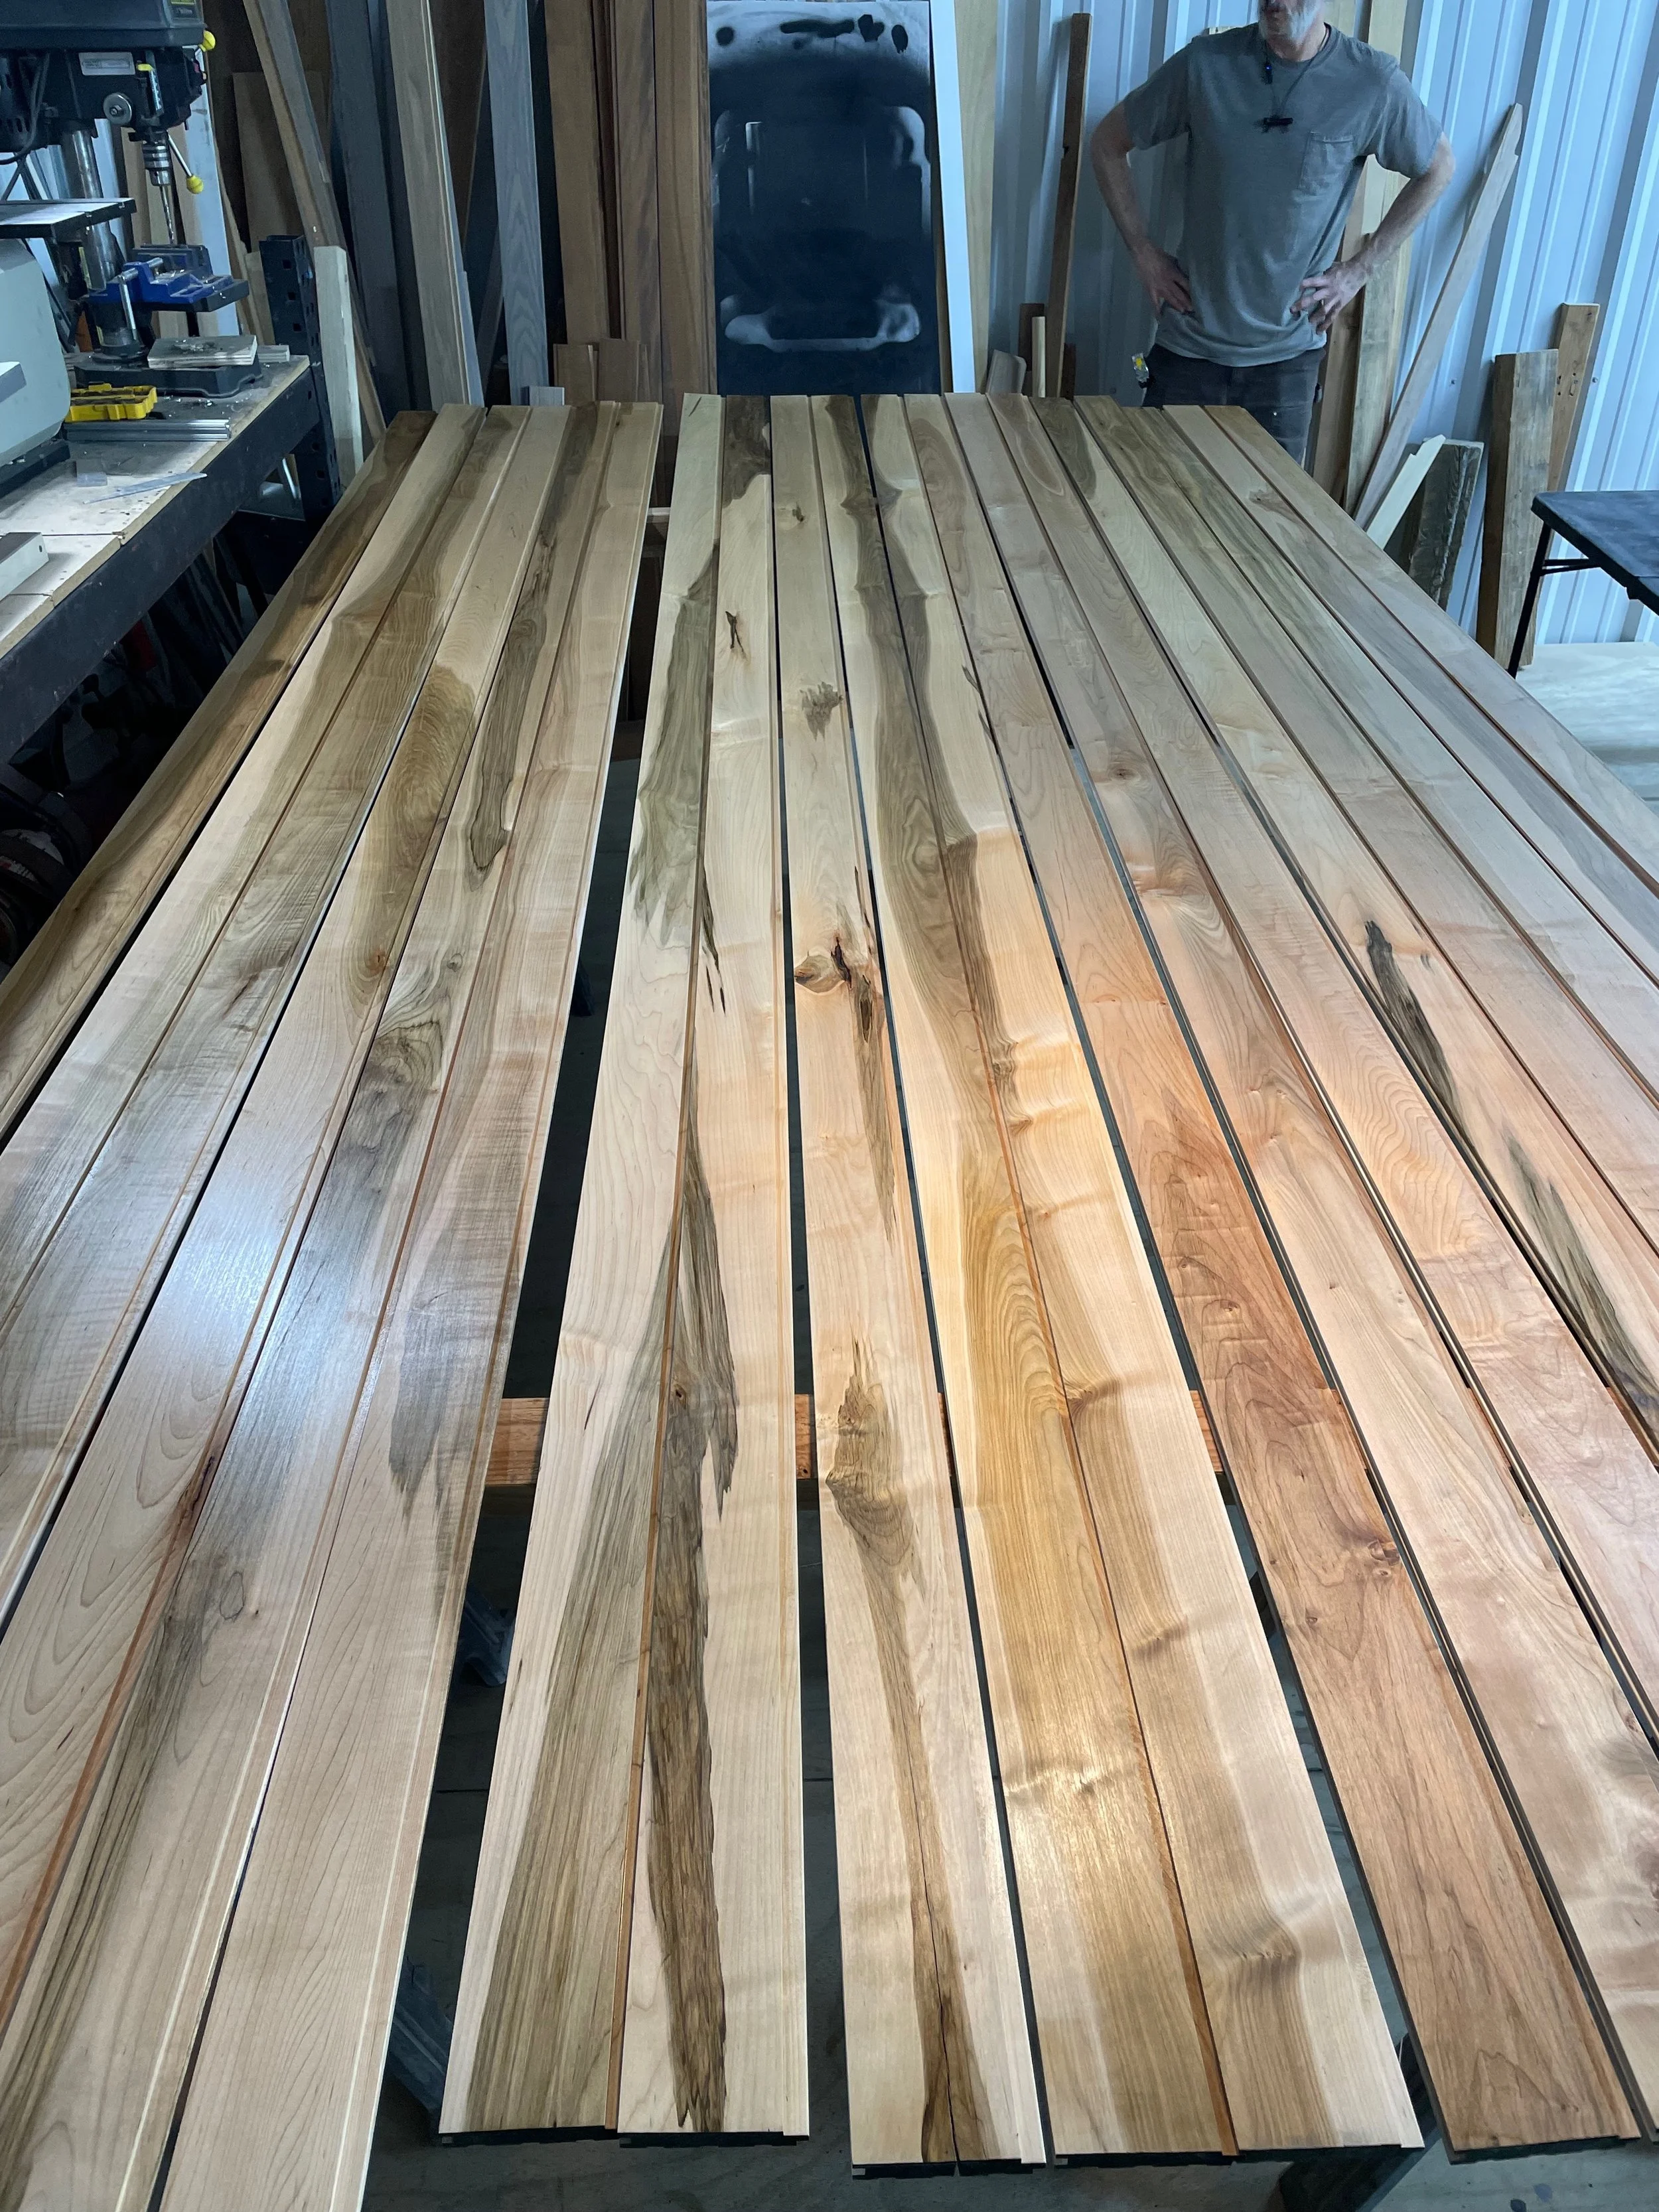
Ceiling: This client loved the natural wood look, so we went with a custom milled Maple tongue and groove board for the ceiling (sourced from Paxton Hardwoods).
We add plywood framing to either side of the metal roof frames and then install the ceiling with brads and the same Sikaflex 252 that we use on the floor for a nice seamless look with no visible fasteners. Like most of the Transits we work on, we use the GoCode Overland Trim Kit to plane out the ceiling and give a nice finished transition from ceiling to factory headliner.
We fill our brad holes with matching putty and finish off everything with Oil Based Polyrurethane to seal it up and highlight that nice natural wood color. Our standard interior lighting package includes 8 of these puck lights installed into the ceiling in two zones of 4 lights. We install dimmable switches for these lights both inside the slider and next to the bed for ease of use from the front or back of the van.
Electrical
The heart of every modern camper van is the electrical system.
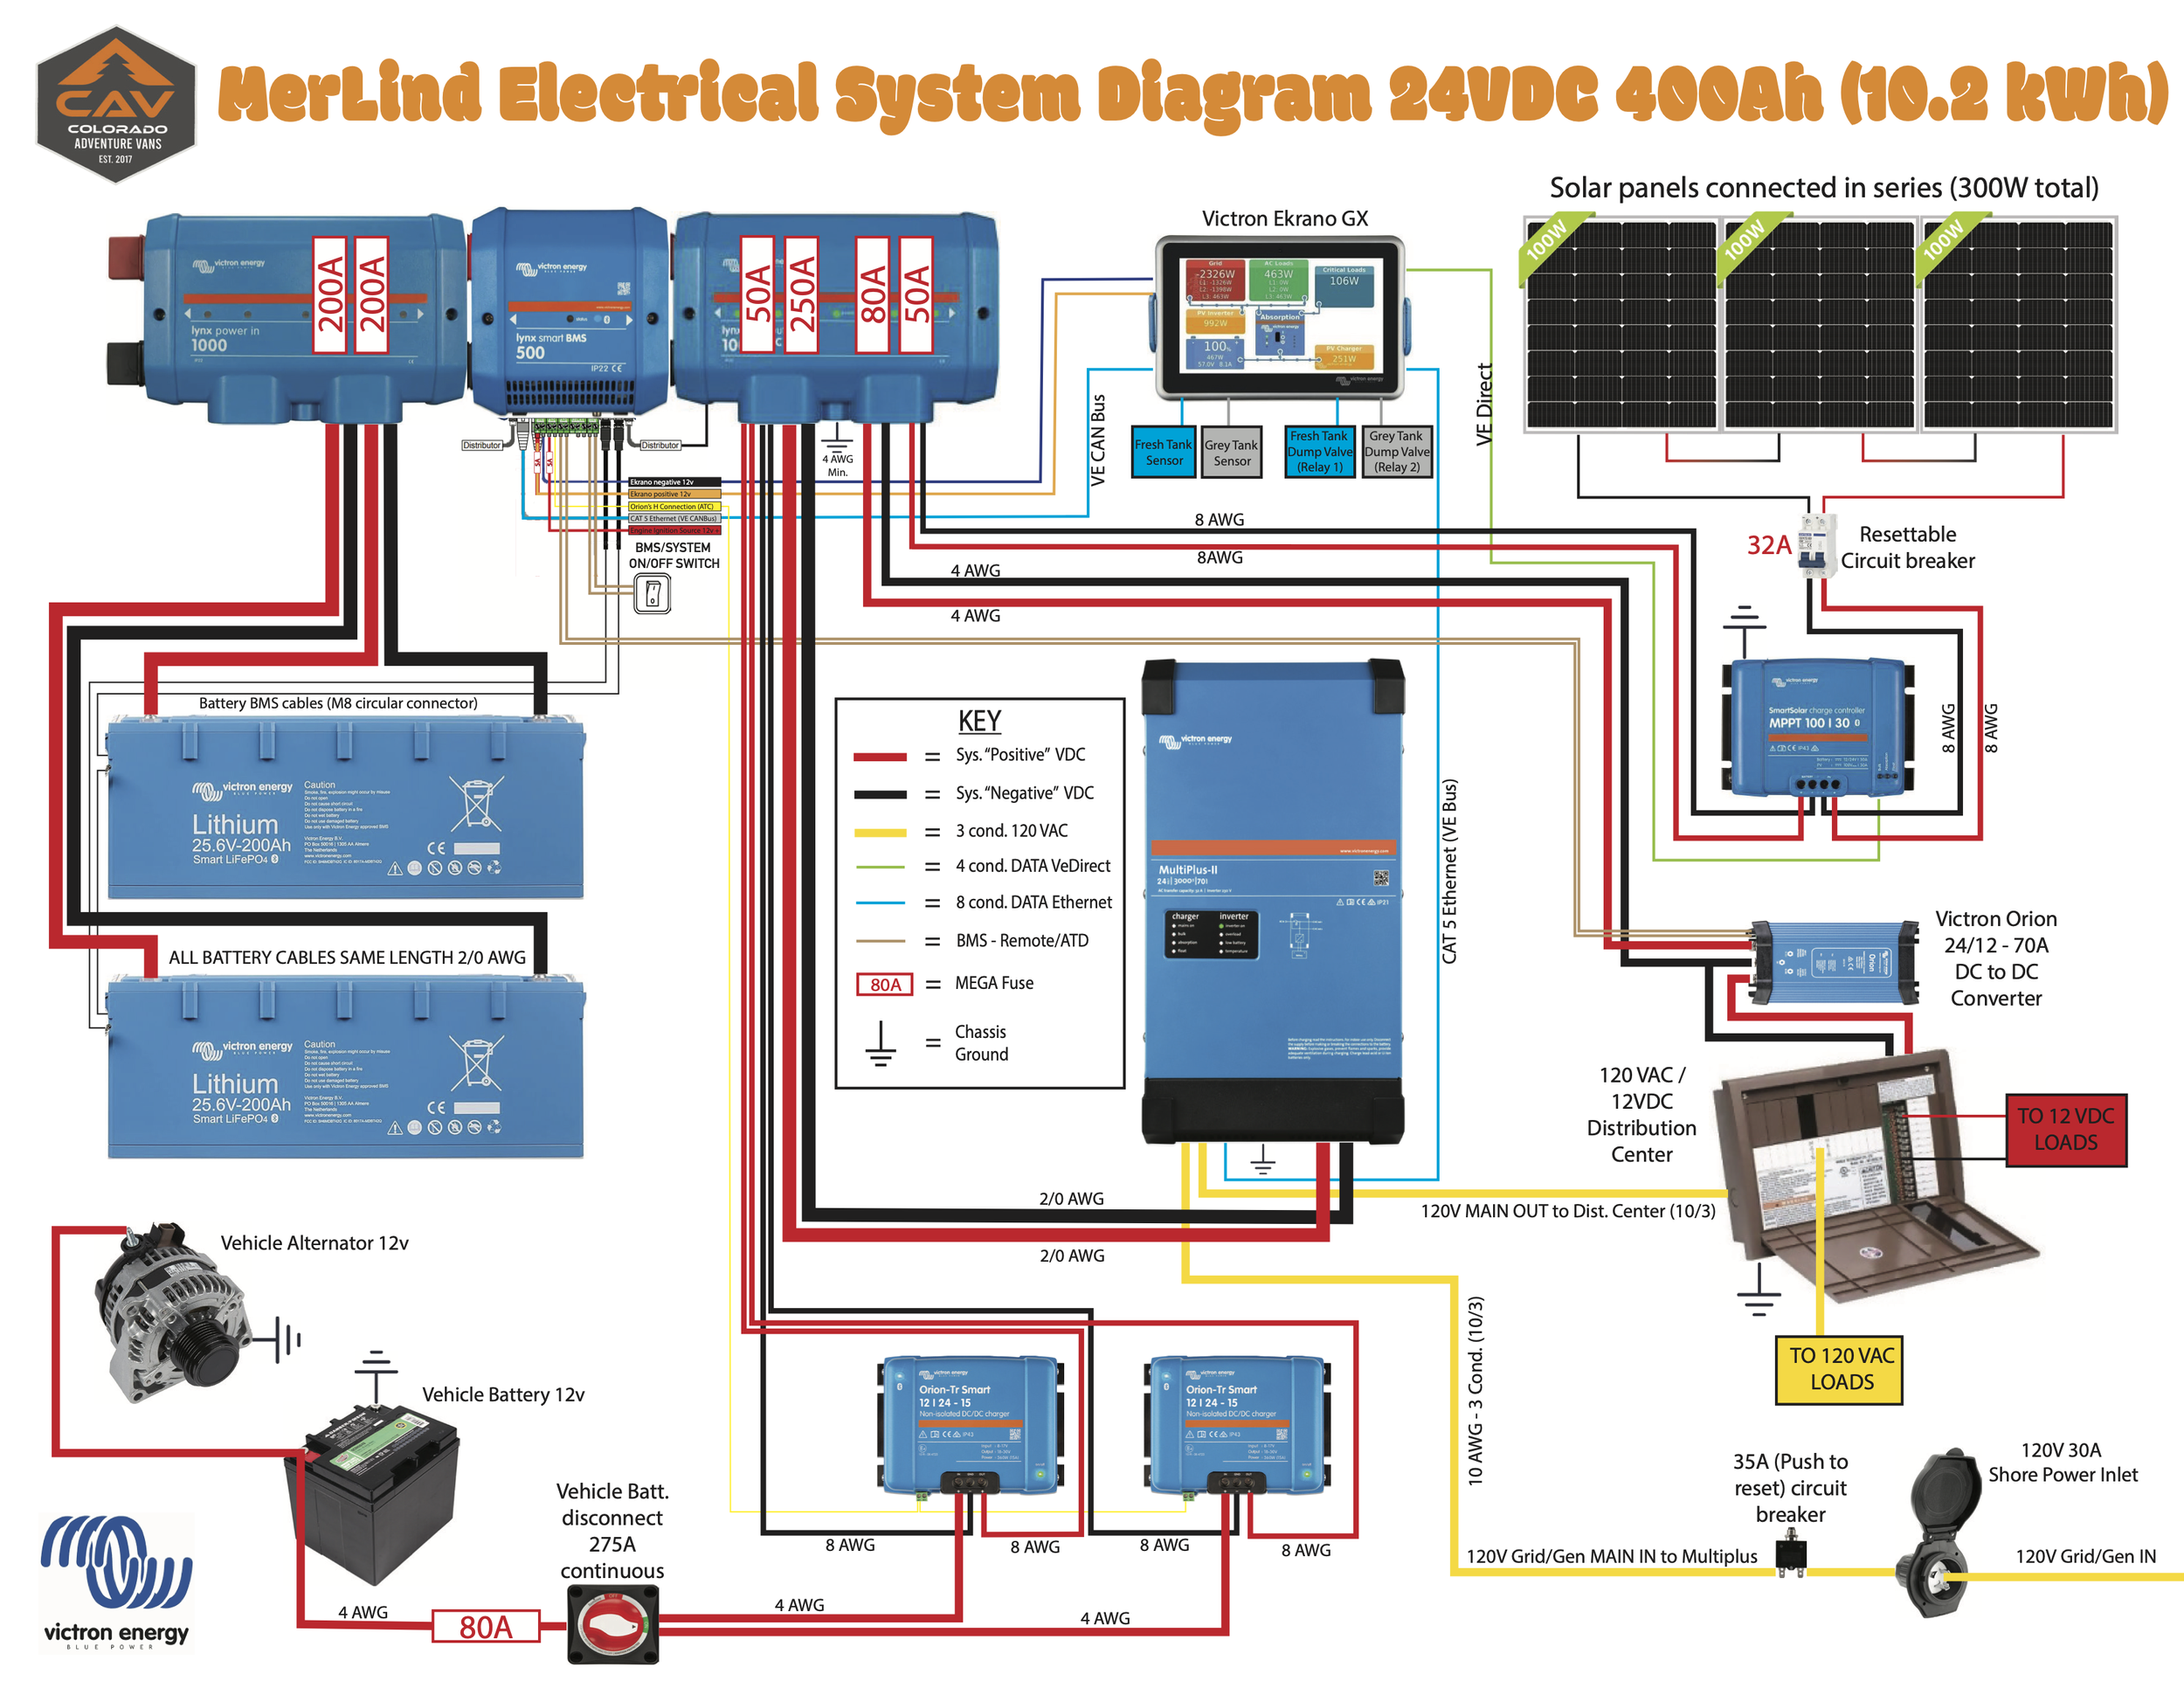
We went big on this one with a 400Ah 24V Victron system to allow them the option of boondocking and running the air conditioner for hours on end.
Battery: Victron 25.6V 200 Ah LiFePO4 Battery (2)
Inverter: We used a Victron 24V 3000W Inverter/Charger to power the water heater, microwave, and 120V outlets.
DC-DC: We installed (2) Victron 15A 24-12v Orion Smart DC-DC chargers to quickly charge the house batteries while driving.
Battery Monitor: The system can be monitored through the VictronConnect app and we installed a Victron Ekrano GX on the wall in the middle of the van for real time monitoring.
Solar Panels: We installed (3) 100W Rich Solar MEGA Slim solar panels on the roof to keep the system charged up while boondocking.
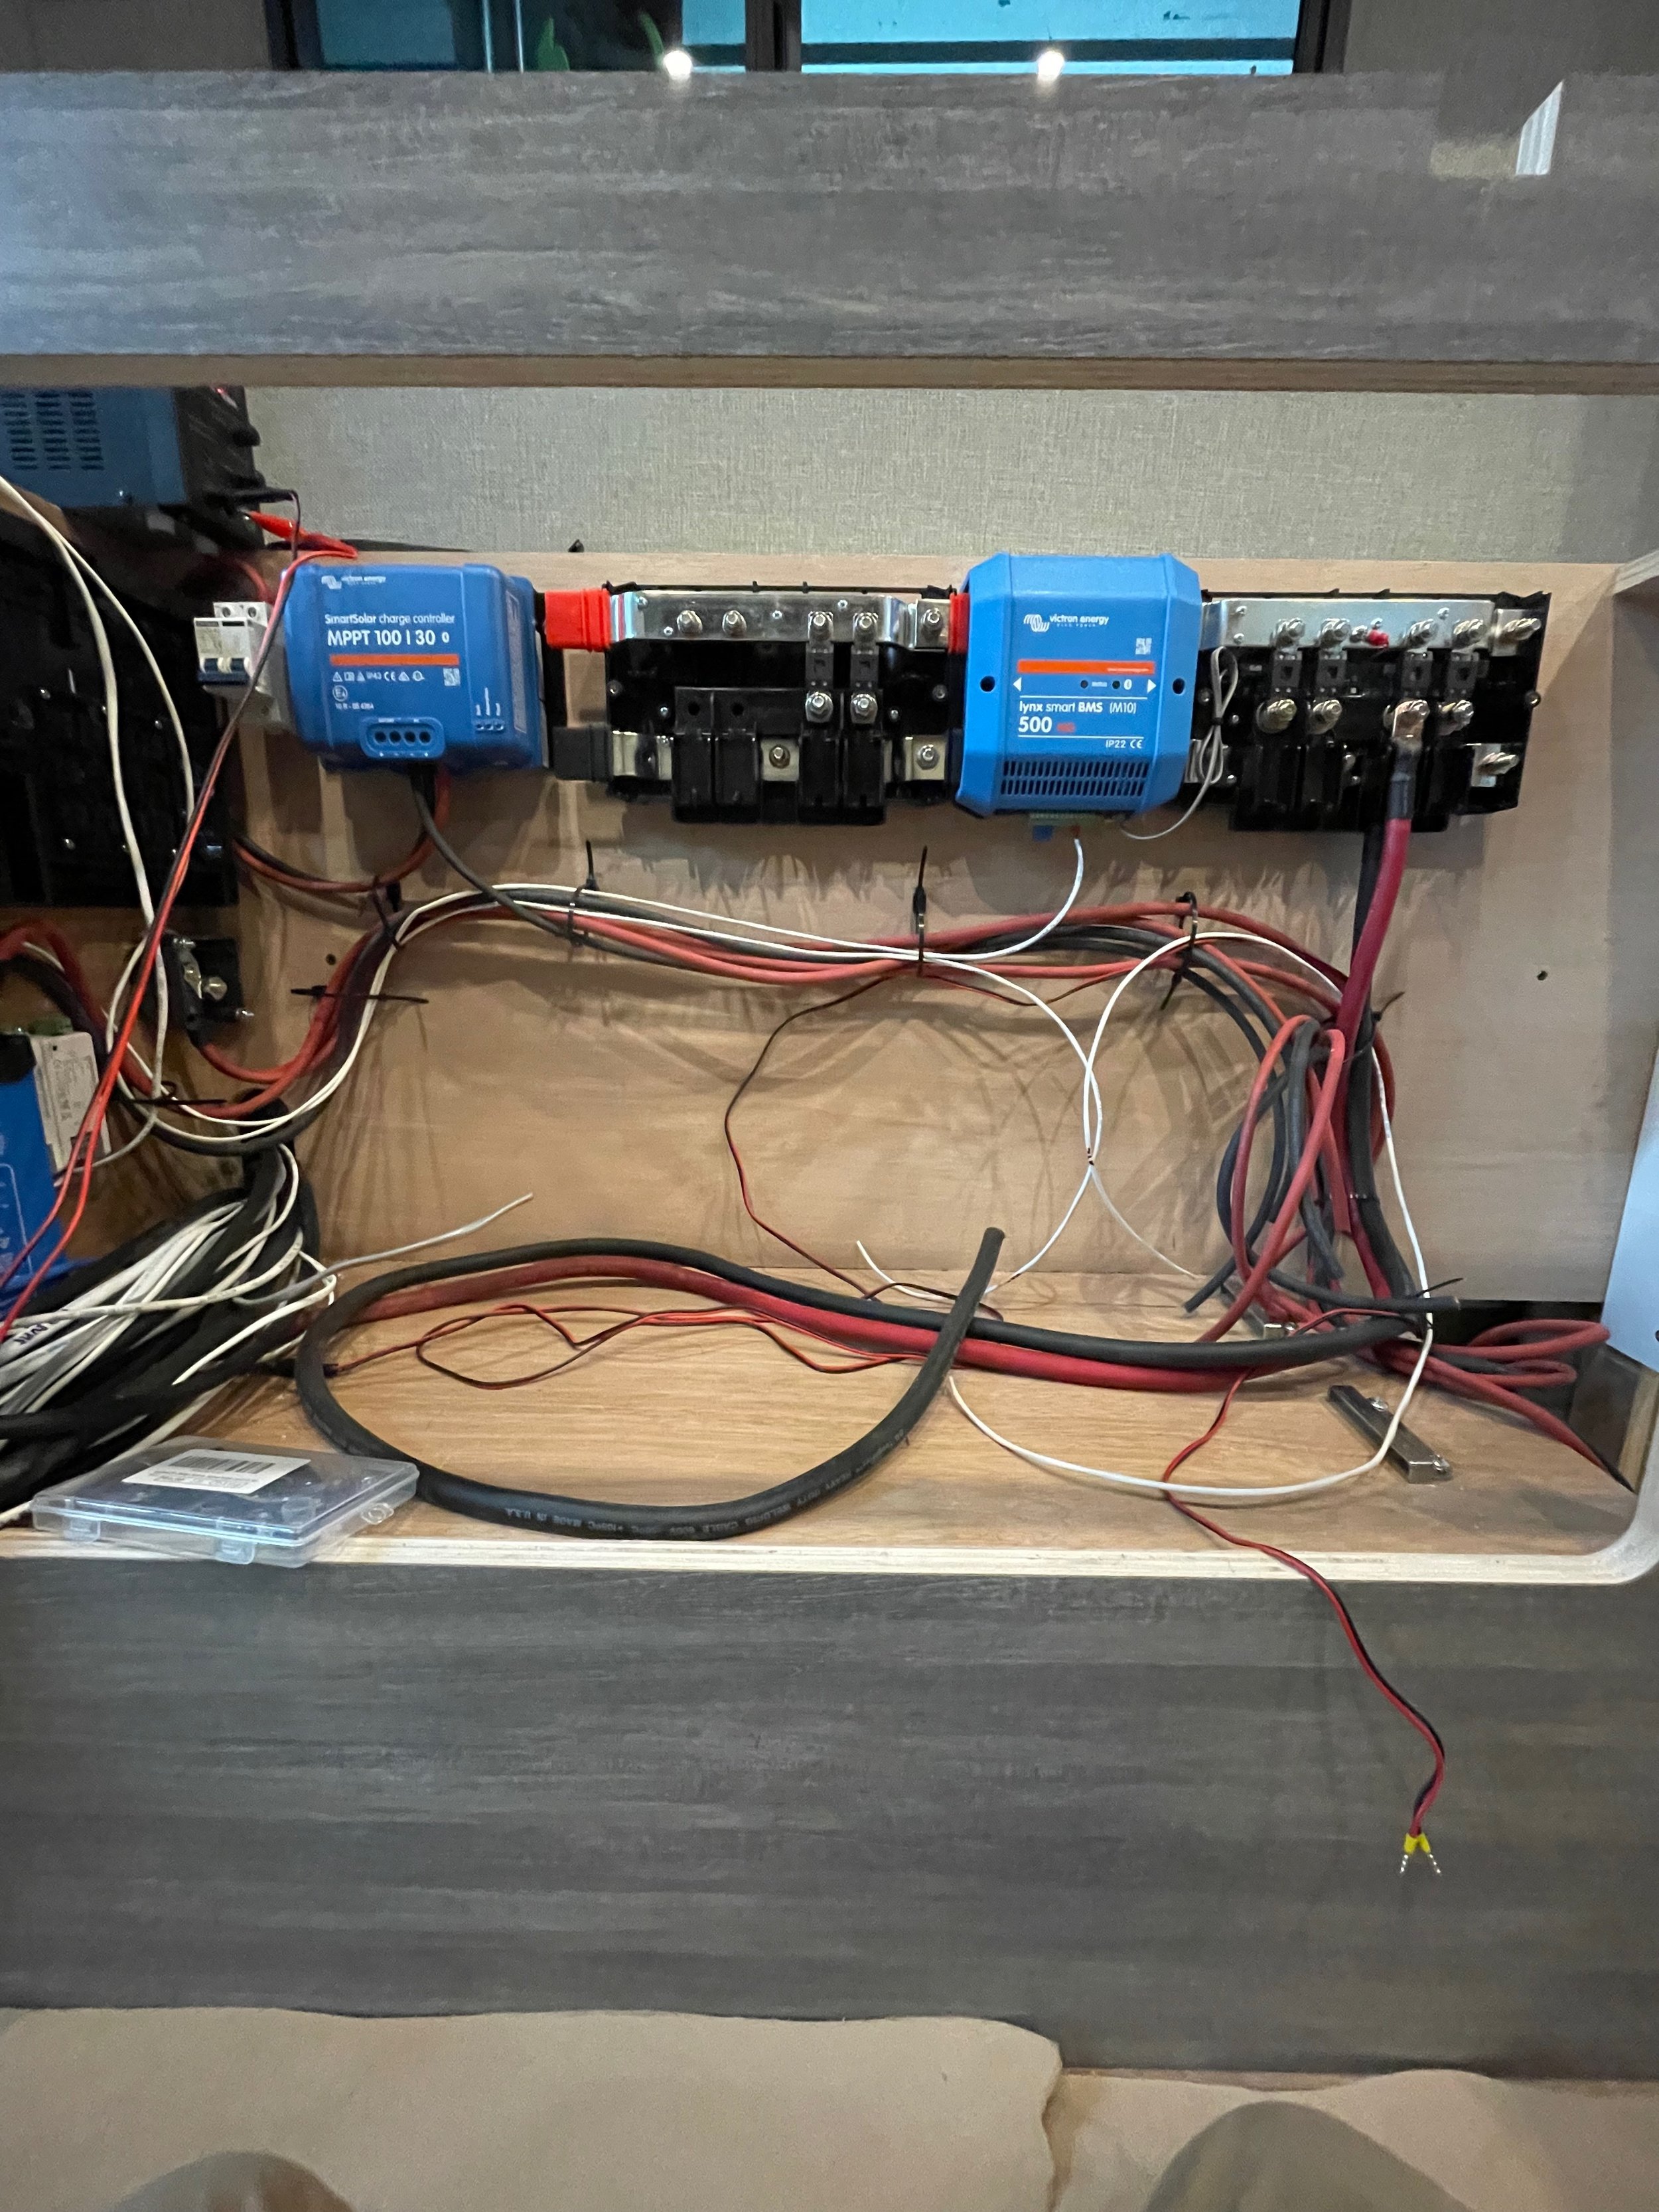
Power Distribution: Power distribution always starts with a main battery MRBF fuse and a master disconnect switch. This system utilized the Victron Lynx Disribution products (Power In, Lynx Distributor, and Smart BMS) for clean cable management, seamless bluetooth communication, and aesthetics (I mean look at this system, our Electrical System Guru, Ryan, killed it). Everything runs to an Arterra Distribution Center that is easily accessed through a cabinet and holds all the 12v fuses and 120V breakers. Since the system was 24V, we had to step down voltage to 12v for most components in the van. This was accomplished with a Victron Energy Orion 24/12-Volt DC-DC Converter.
Send an email to off_grid@coadventurevans.com if you’re interested in our help building or consulting for your electrical project


Plumbing

We used this Passenger Side 22 Gallon Wheel Well water tank, and a 20 gallon passenger side undercarriage tank to catch water from the sink. The tank, water pump, and accumulator tank were installed in the rear passenger side box. We also installed a winterizing kit so that the fresh water lines could be blown out in the winter instead of filling the tank with antifreeze. (check out our Amazon storefront for a video explaining how this system works).
The plumbing ran forward in the van to the galley where under the sink we hooked up an Isotemp Slim Square water heater and a Guzzle H20 water filter for clean drinking water on tap. We wired the water heater into a timer so that it couldn’t stay on indefinitely and drain the battery. The system also ran to the back door where we installed an ITC Stainless Steel shower for a quick hose down in a pinch.
Now for the extras… using the Victron Ekrano we gave these customers the ability to monitor and drain their plumbing systems. We hooked up these tank sender units in both the fresh and gray tanks to monitor the water level at the Ekrano screen. There are also two relays available on the back of the Ekrano so we used these to control the fresh and gray tank drains. The gray tank drained through a 1” motorized ball valve, and the fresh can be drained through a 1/2” valve.

This van has 22 gallons of freshwater capacity, and 20 gallons of gray water capacity mounted under the van.
See what we used in this van below or click this link to visit our standard van plumbing parts list:

Colorado Adventure Vans is an Upfitter based in Golden, Colorado.
Building out vans since 2017, we take great care with every build in our shop. Our focus is quality, not volume, aiming our attention to detail to ensure your adventure rig is ready for anything the road throws at you.

Follow us on social media
Head to your favorite social platform below to stay up to date on all things Colorado Adventure Vans. New vans, rental destinations, & more.
Cabinets, Layout, & Interior Design
The layout for MerLind was motivated by comfortable travel for the clients 5(!) furry companions and an easy, comfortable living area for the pit stops. We love the stationary east-west bed layout that Flarespace allows and the custom dog crate that we installed fit perfectly where previous customers had prioritized bikes or gear storage.

We used lightweight Luan plywood (sourced from Austin Hardwoods here in Denver) and laminated everything with Formica Weathered Fiberwood. We used a bit of Baltic Birch plywood for the cabinet doors. It’s heavier weight, but it holds its shape better when unsuported. All the plywood edges were finished with matching edgebanding for a seamless finished look.
We installed an Isotherm Cruise 85 Stainless Steel fridge/freezer into the galley. With the remaining space we were able to fit a single large drawer above the fridge. We always use Blum Undermount Drawer Glides in our vans - the drawer in the galley was 18” deep.
The sink ate up about 10” of depth in the galley so we couldn’t get any additional storage under the sink. We installed this sponge tray on the door below the sink with some tip out hardware to take advantage of some of that space.
The countertop and flip up extension piece are Gray Onyx Corian that we had fabricated by our friends at Colorado Countertops. We didn’t install or order a cooktop for this customer, but we included outlets on the galley that could handle one if needed down the line.

The bench on the driver’s side wall holds a Wrappon Trekker toilet, additional storage, and access to our battery cabinet. We also took advantage of the dead space in the wall behind the driver seat and installed some cool shallow shelves for books/spices/dog treats. The front seats swivel so we installed a Lagun table next to the toilet for a nice eating/hangout area at the campsite. The bench cushions were custom made with 3” foam and Hamilton Weaver fabric.
Around the bed we installed more usable storage - cupholders and two long thin storage cubbies for keeping the essentials next to you in bed. Above the head side of the bed on the wall we installed an open shelf with reading lights on the underside. There are USB ports on the lights to charge phones on the shelf while you sleep.

For the upper cabinetry we designed around a microwave (plus trim ring) installed opposite the galley. We put upper cabinets about the foot side of the bed for even more storage and installed a mirror on the end of it above the sink so you can make sure you brush every last tooth.
All of our cabinet doors stay open with the help of gas struts. The cabinet doors open with Blum overlay cabinet hinges (Blum hardware is the best we’ve found) and we used RV Labs locking drawer latches to keep everything closed when driving down the road.


CLIMATE Control Systems
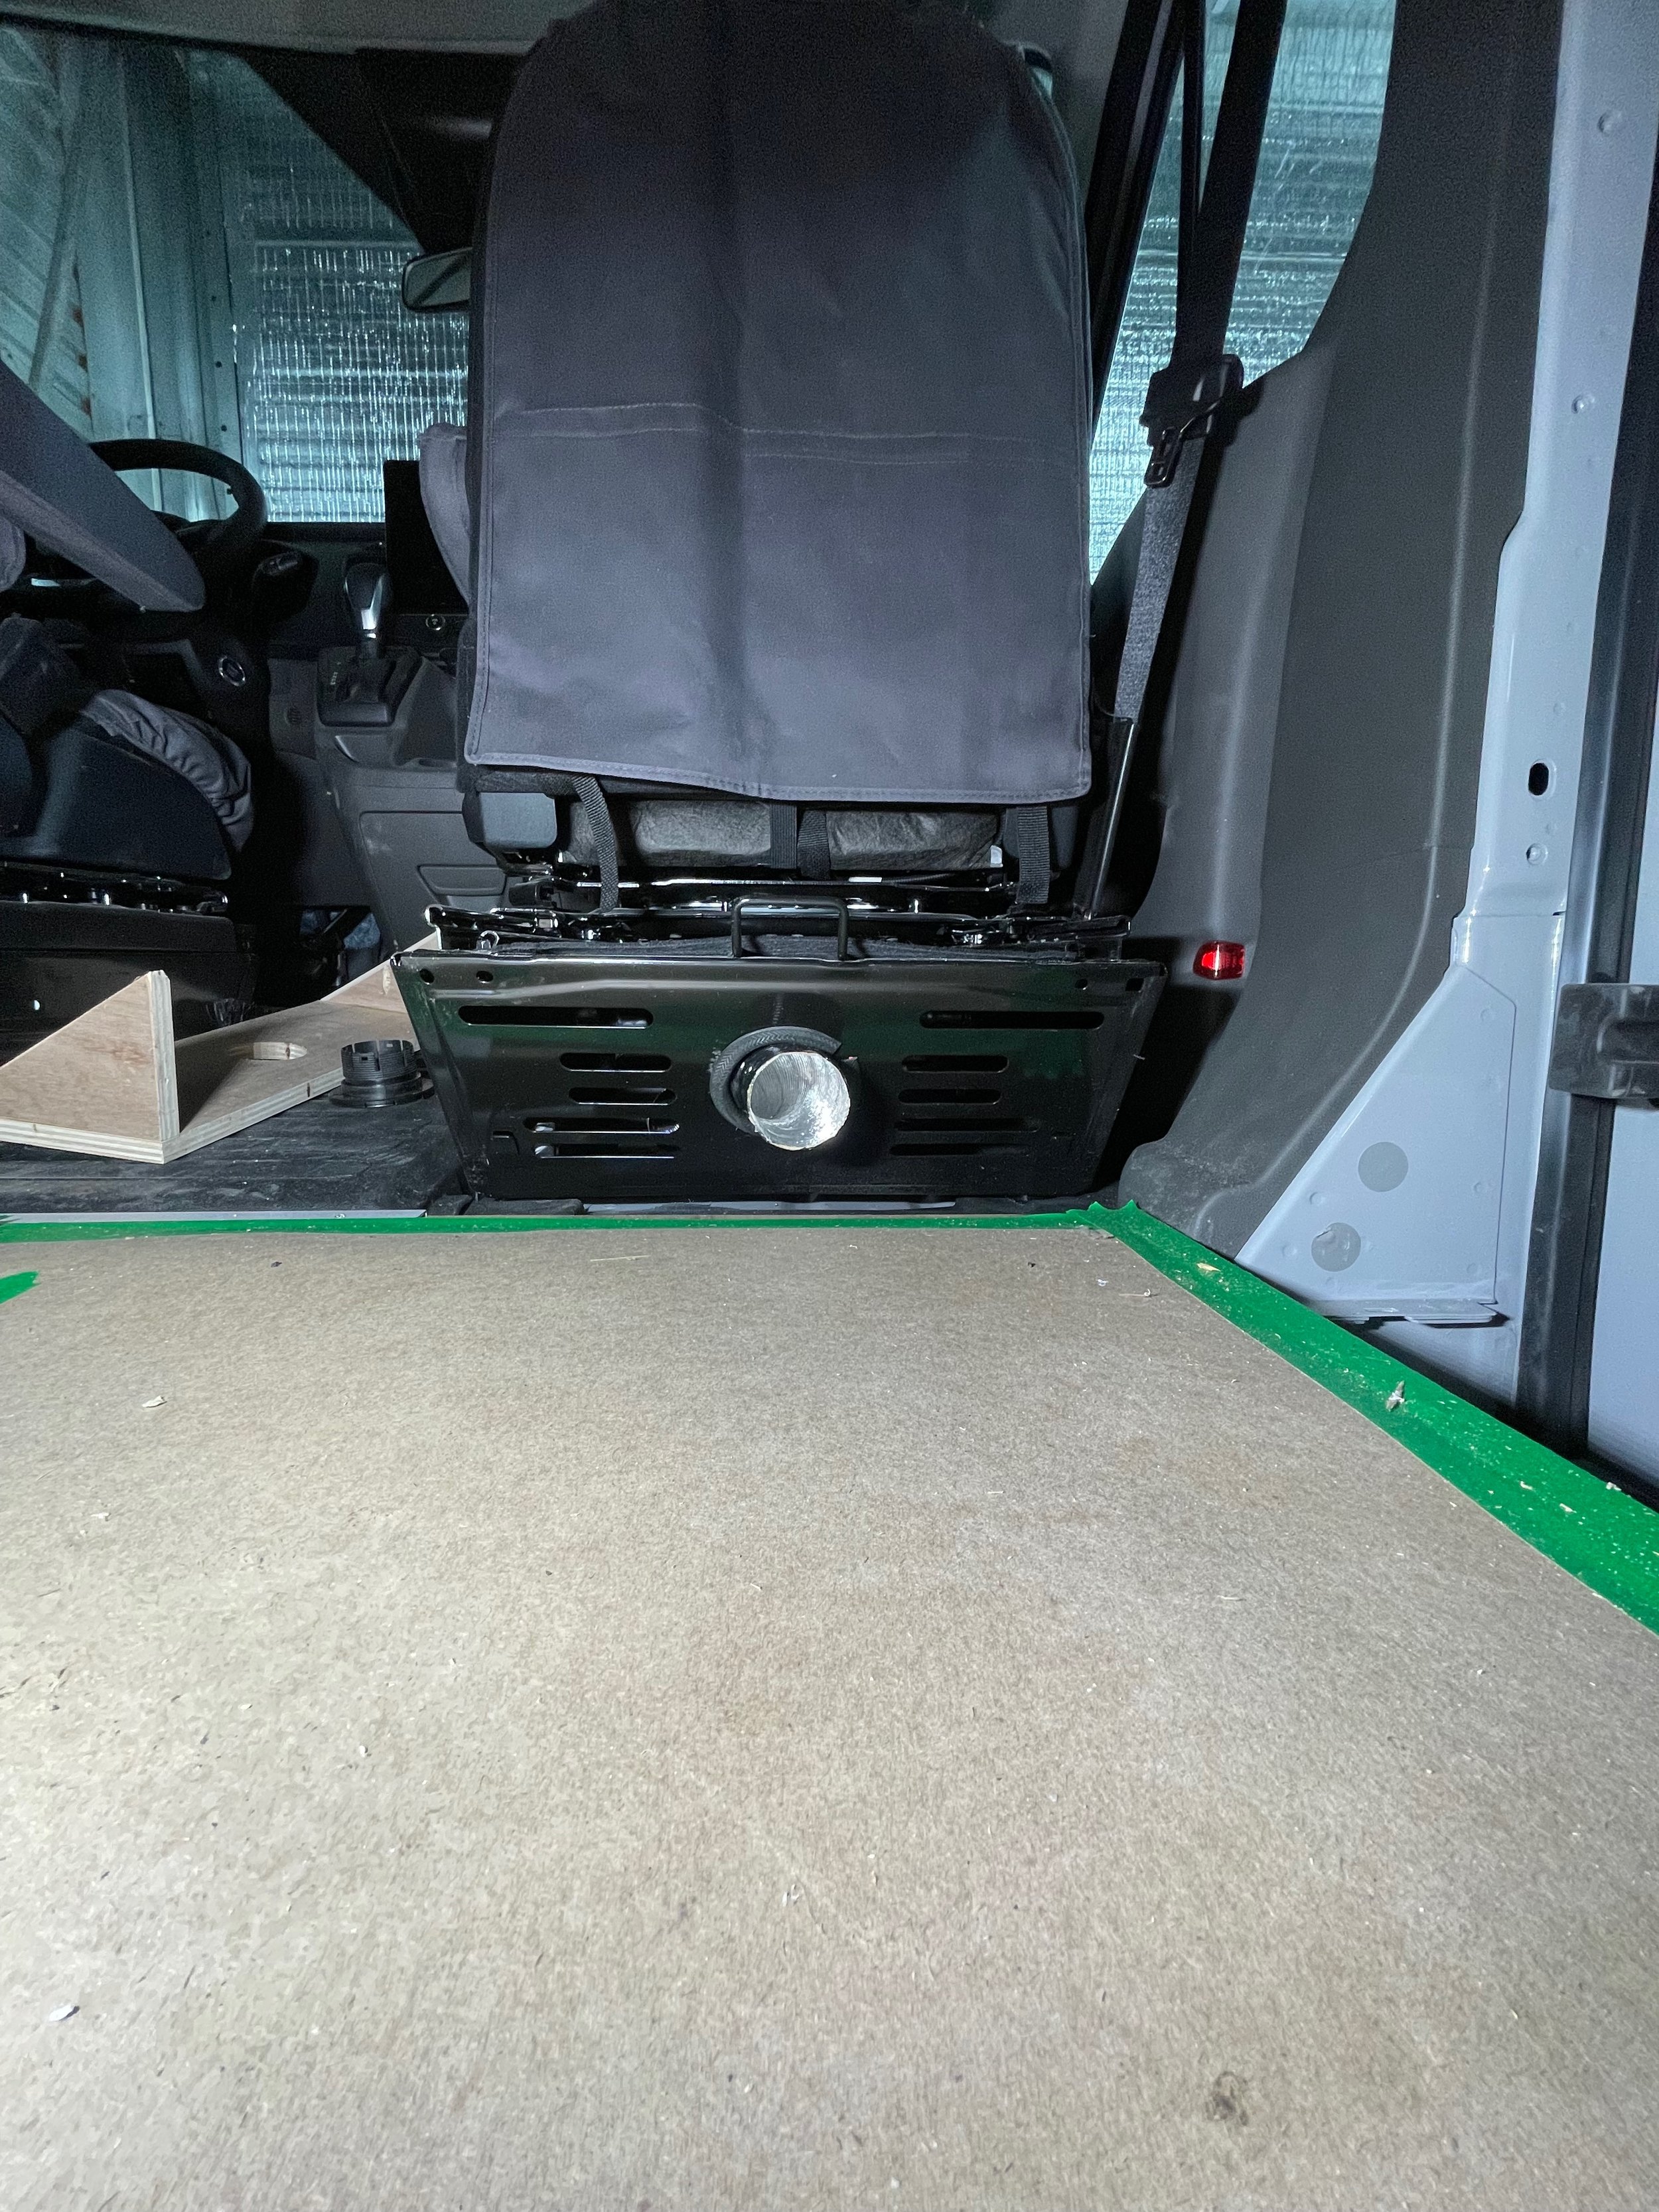
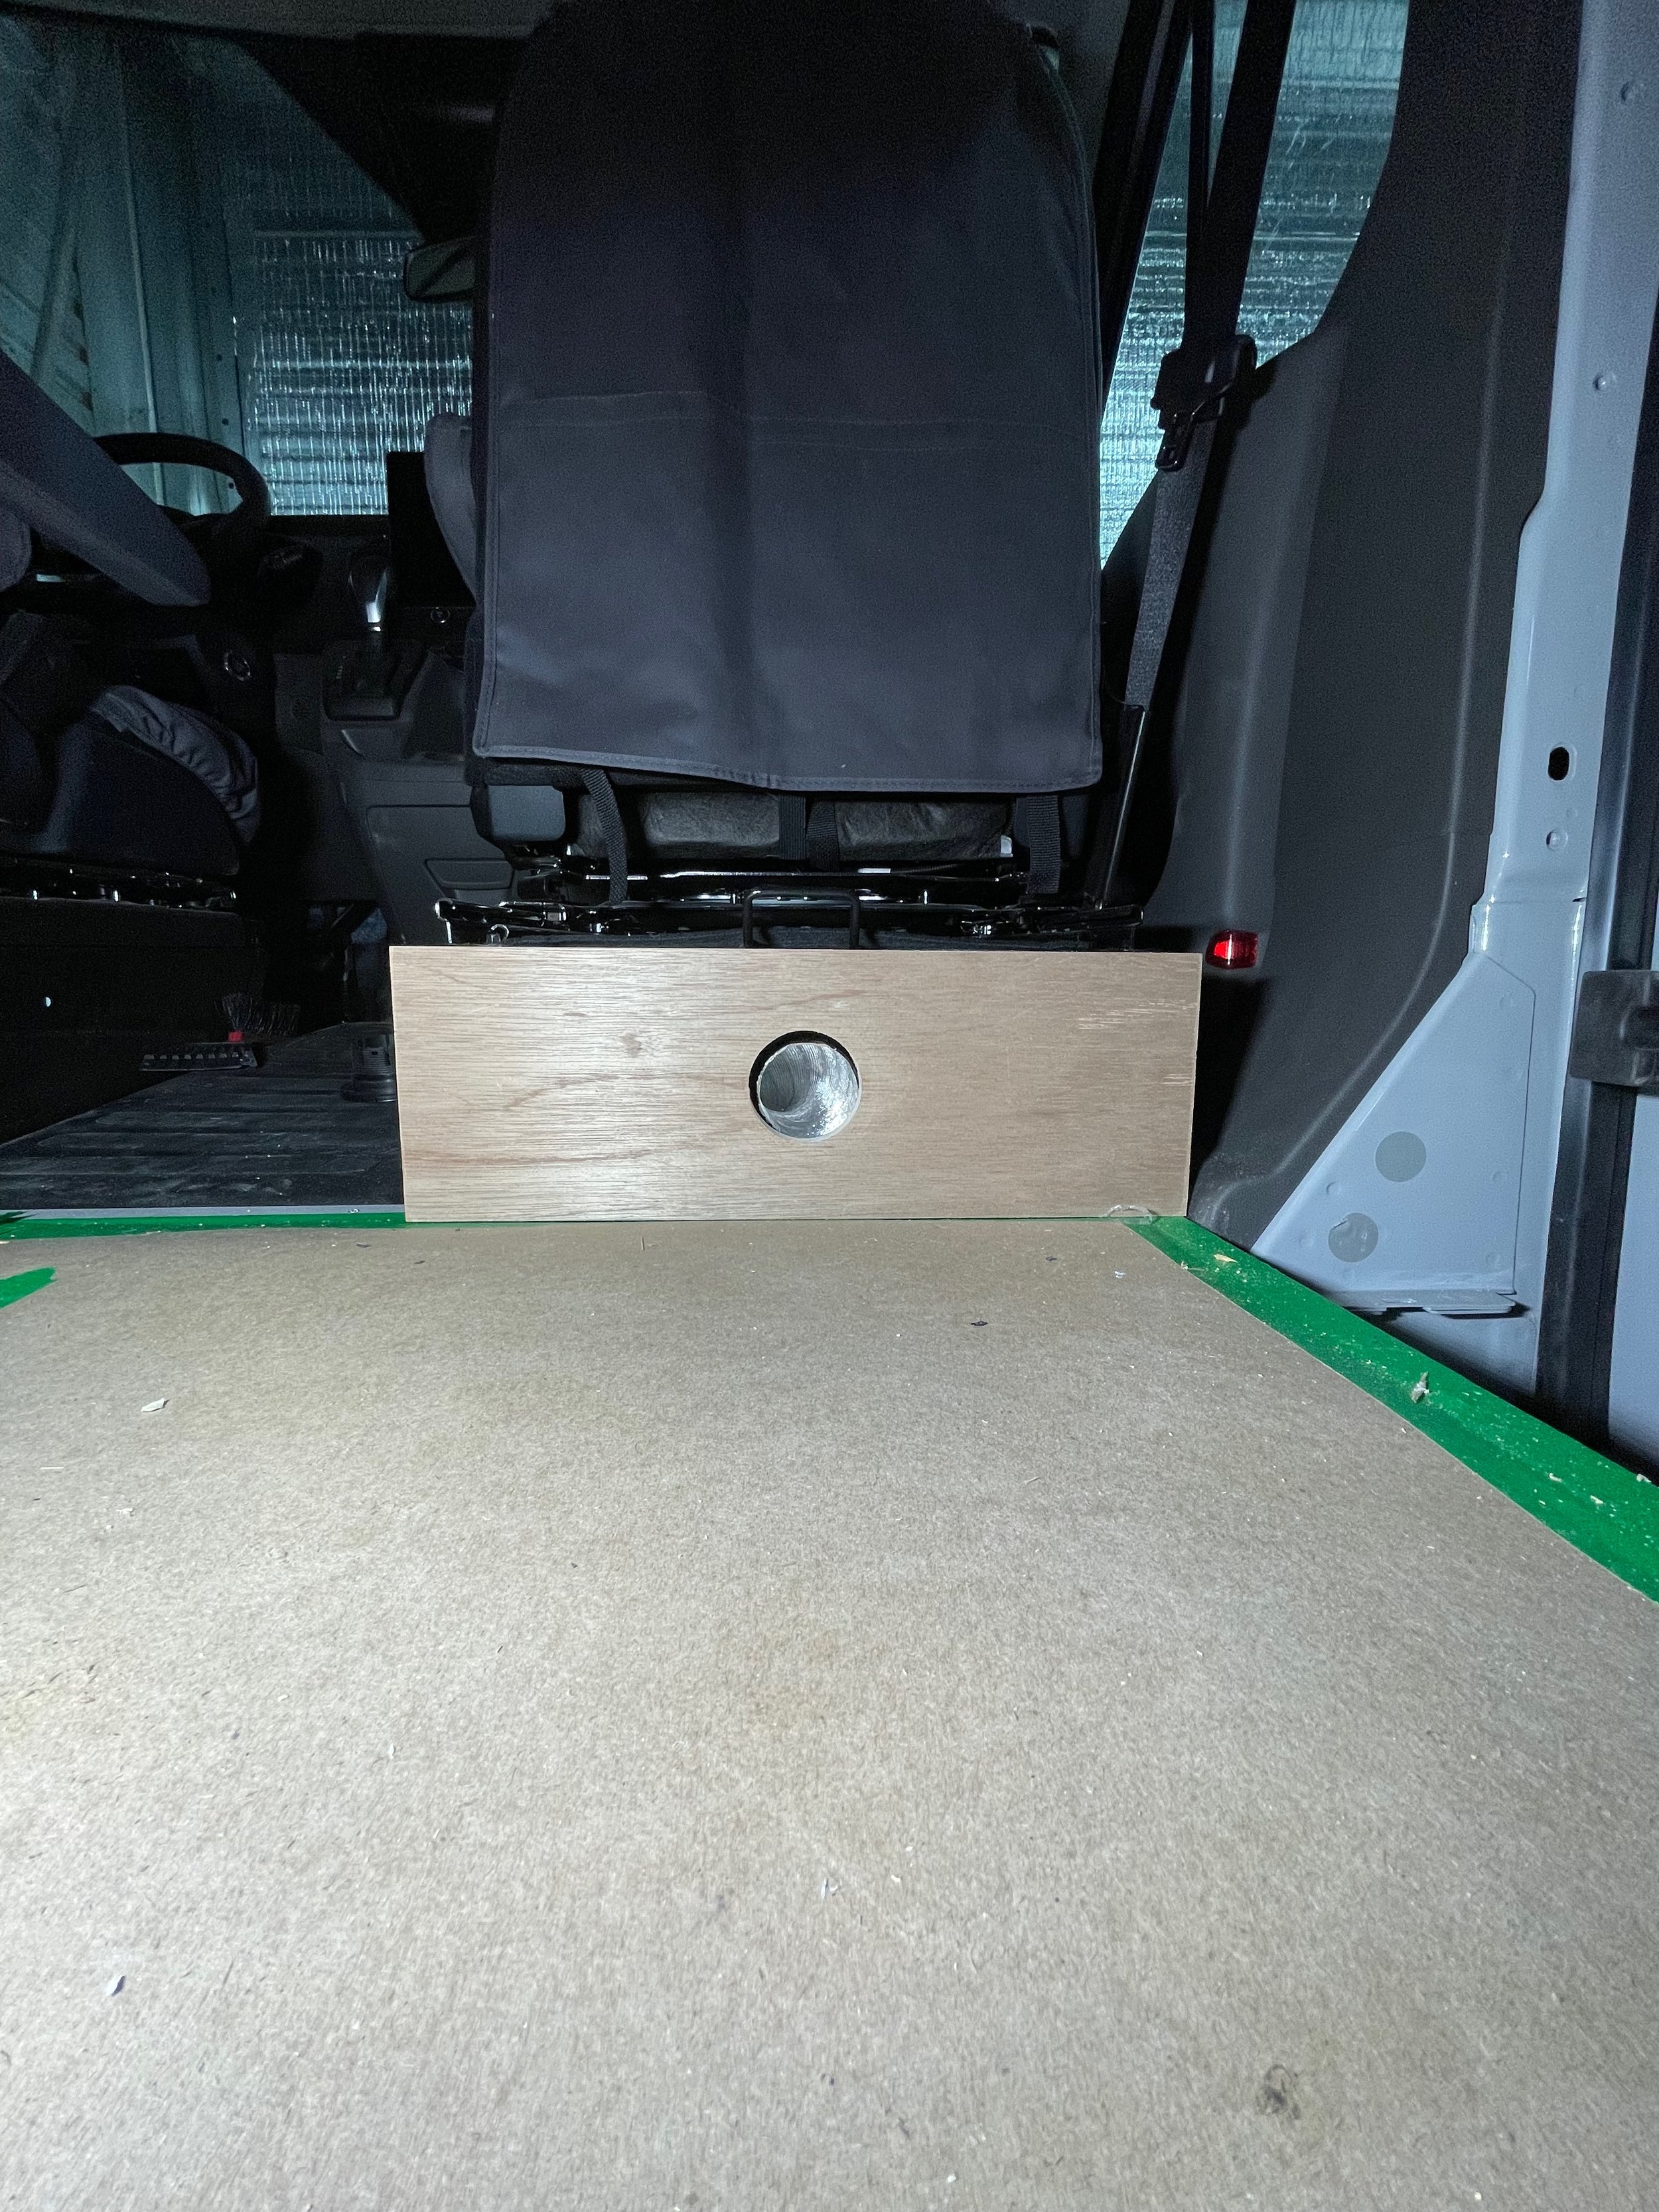
A Maxxair 7500K fan above the bed keeps things breezy when the bunk windows are open. We always use a roof adapter on these fan installations so that the fan sits nice and flat on the roof. For those hot summer days we installed a Houghton Low Profile Air Conditioner in the middle of the van and an Espar AS3-B2L Gasoline heater under the passenger seat keeps things nice and toasty in the winter.


On the roof we installed a Flatline Van Co Transit Low Pro Roof Rack. We bolted a Fiamma F45S 300 Awning to the side of the roof rack for shade in a pinch.
We installed Flarespace Flares in the back with 10x33” windows on both sides.
Luverne MegaSteps help with the step up into the van since our neighbors at Tourig beefed up the wheels, tires, and suspension. The suspension is a Q-Lift and Tourig also installed a Bilstein B6 shock and strut upgrade. The wheels are Black Rhino Sequoia and the tires are BFG KO2 245/17/16.
Exterior Upgrades

Don’t hesitate to reach out to john@coadventurevans.com for DIY product recommendations, assistance with your project, or any other questions you might have. We’re always happy to help!